
Table of Contents
As we have configured our first subscription form with Fluent Forms in the previous Opt-in Forms (Fluent Forms) Basic Configuration guide, we are already familiar with Creating Subscription Forms, Mapping List & Tags. Form Actions, Embedding Subscription Form. In this tutorial, we will be extending the form we have created in that guide.
Fluent Forms
Fluent Forms is also a popular WordPress plugin that is highly customizable with respect to features and designs. The full documentation of Fluent Forms is here: Fluent Forms (wpmanageninja.com)
Adding New Fields
From the basic configuration guide, we saw the Edit Form buttons from both of FluentCRM and Fluent Forms. Now we are going to Edit the Form we want.
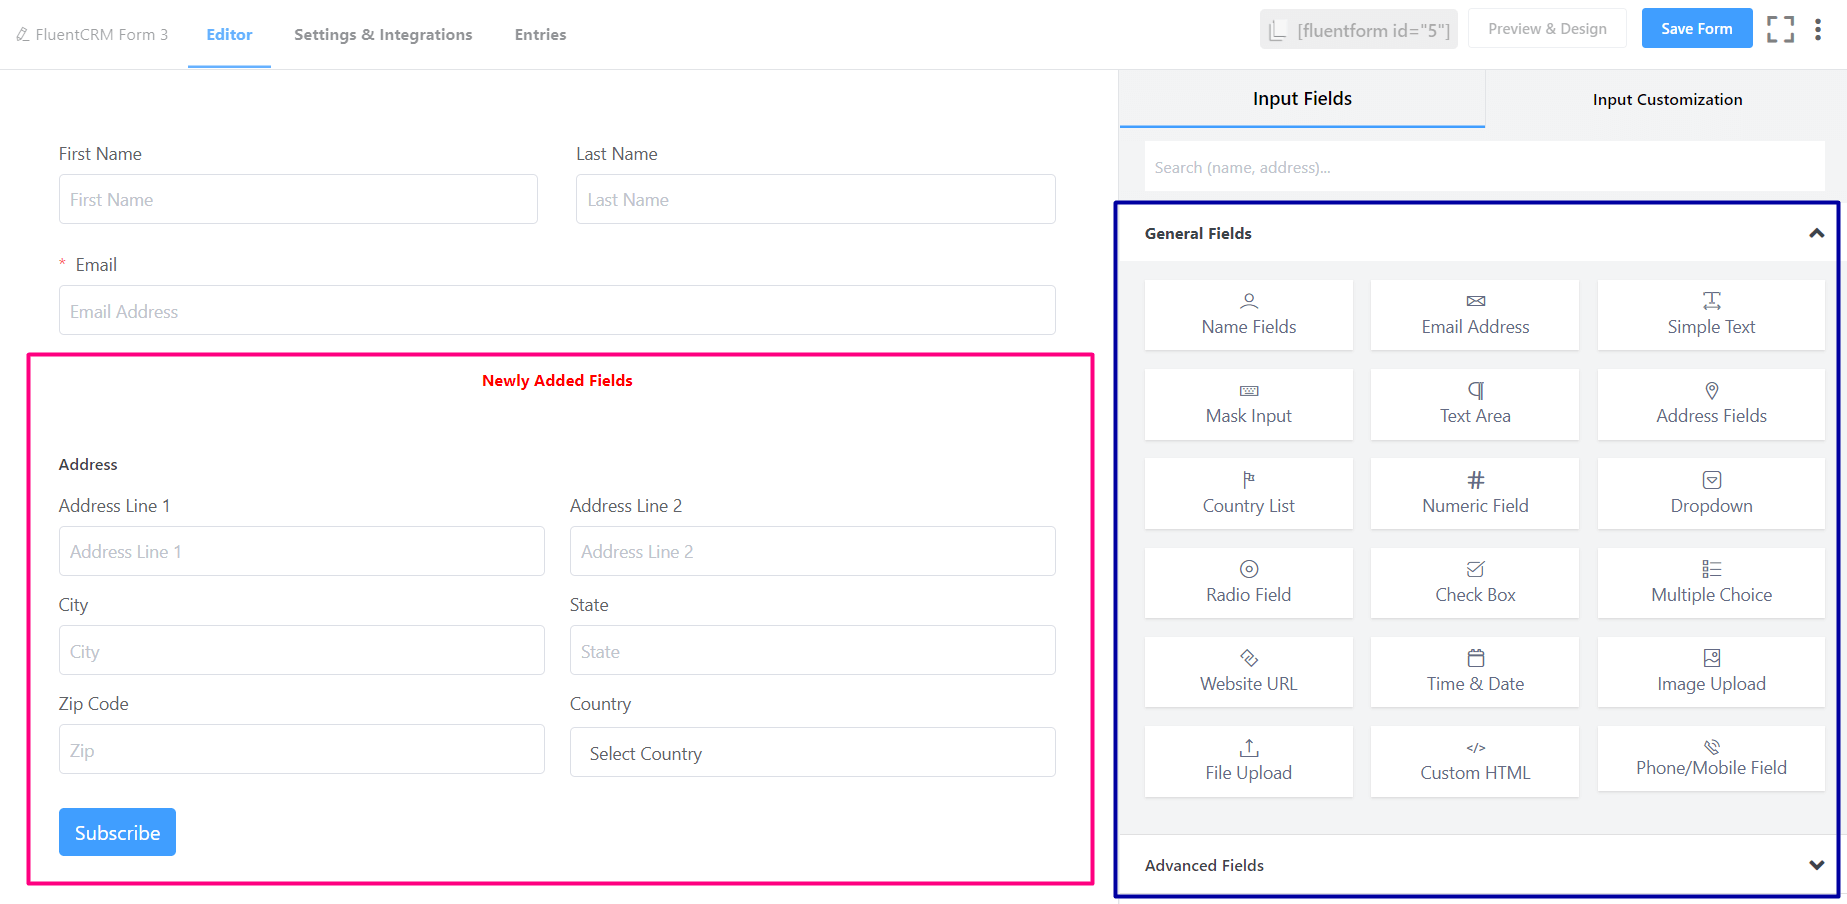
Aside from the pre-made templates, You can also add other input fields in the Opt-in forms and feed them to FluentCRM. A more in-depth guide is on the How to Add Fields to Fluent Forms page. Below we have added a new Custom HTML section to just show a message and an Address Field that contains a few address-related information which we will be storing in FluentCRM contacts as well.
Preview Form
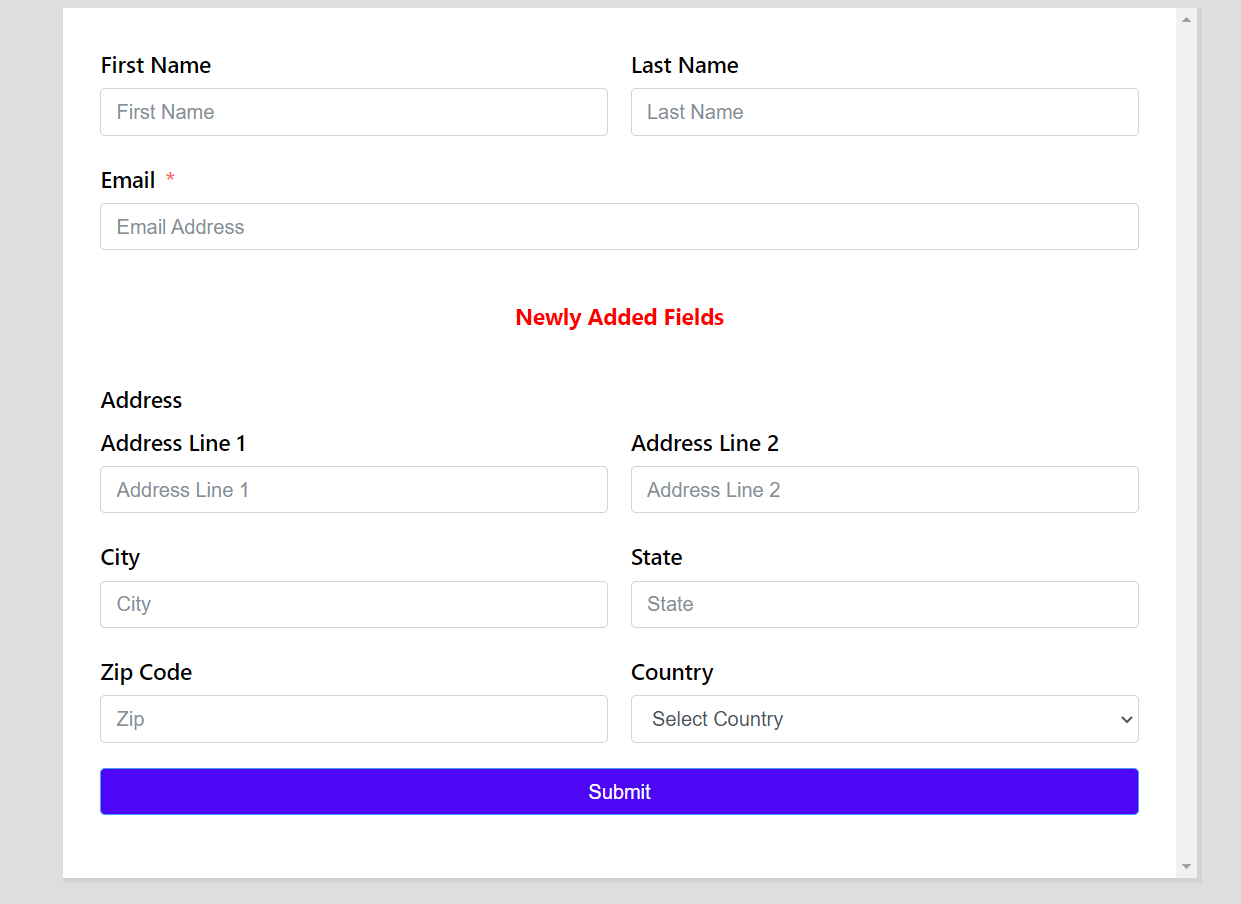
Now to preview the newly added fields, please click on the Save button in the top right corner and then click on the Preview & Design button that will redirect us to a new tab previewing the new changes to the subscription form. Our customized form will look like the below screenshot:
Form Settings
Now we will be checking the Fluent Forms settings. To enter into the settings of Fluent Forms, please click on the Settings & Integrations tab in the top section.
To learn more about Fluent Forms settings please visit Advanced Features & Functionalities in Fluent Forms. Here we will be reviewing Double Opt-in emails in Fluent Forms and Advanced Form Validation in Fluent Forms.
Double Opt-in Confirmation
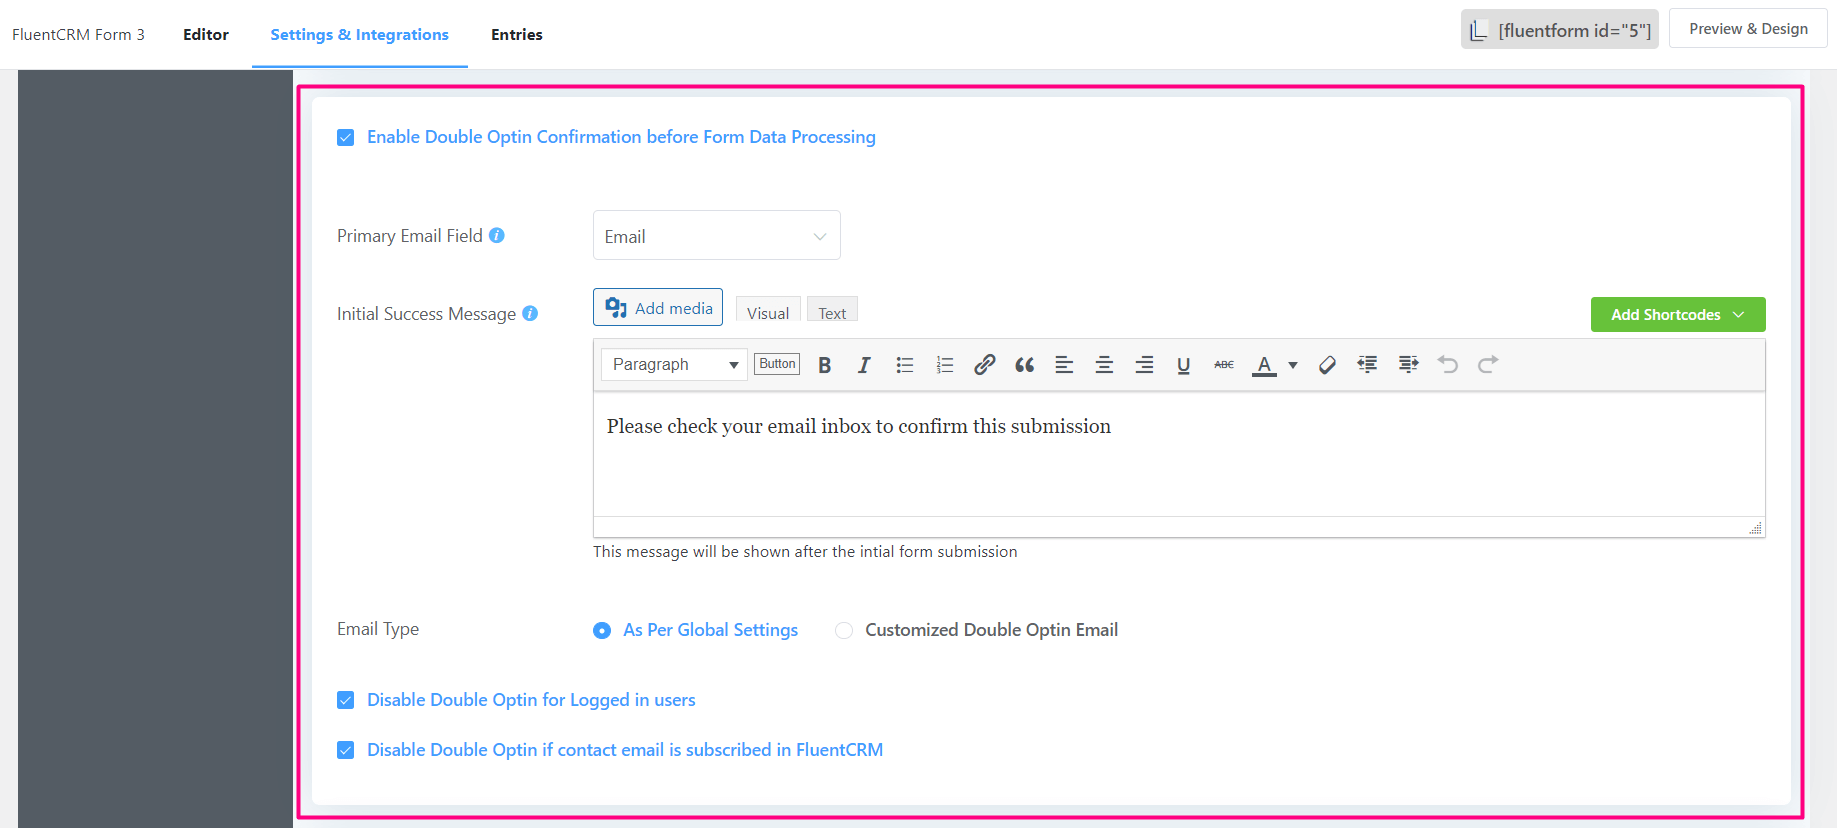
If you came here reviewing FluentCRM global settings you already have seen Double Opt-in Settings and know how it works. Fluent Forms also offers a double opt-in confirmation process for form submission that enables the admin to ensure the entries submitted are not done by robots or any automated sources and also protects the configured feeds not being bloated as well. Enabling this option will send a form submission confirmation email to the user.
After the user confirms the submission by confirming the URL in the Email, the form submission will be processed and FluentCRM data will be processed. If you have enabled double opt-in confirmation for users then now the user will get another email asking to confirm the FluentCRM Email Marketing & Newsletter subscription.
You can additionally Disable Double Optin for Logged in users, Disable Double Optin if the contact email is subscribed in FluentCRM by checking the options, and also customize the Form Subscription Double Opt-in confirmation email.
Advanced Validation
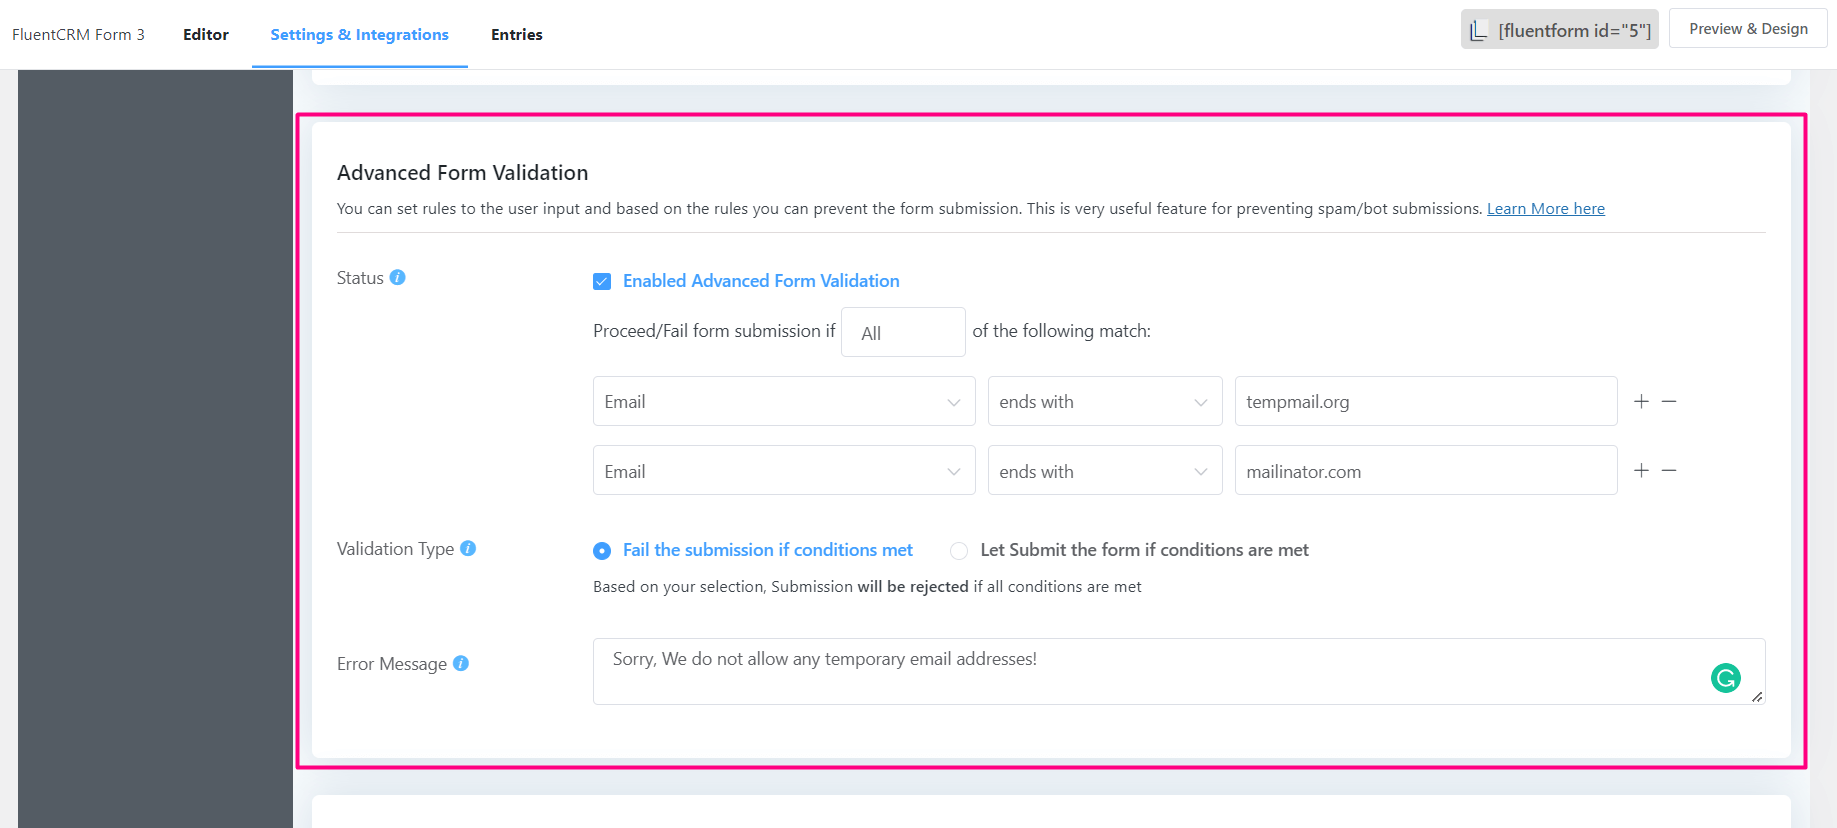
The conditions can be set either to fail the submissions or to process the submissions.
As we work with the email addresses of the users in FluentCRM is also very important that we avoid temporary emails. We can achieve something like that in the very first place by enabling Advanced Validation and setting conditions as the above including a Submission Failure Message.
That is just a single-use case. This feature is possible to use in various conditions and use-cases like placing a passcode and providing only to known users that passcode to use while submitting the form. Otherwise, the form submission will not even initiate.
FluentCRM Feed
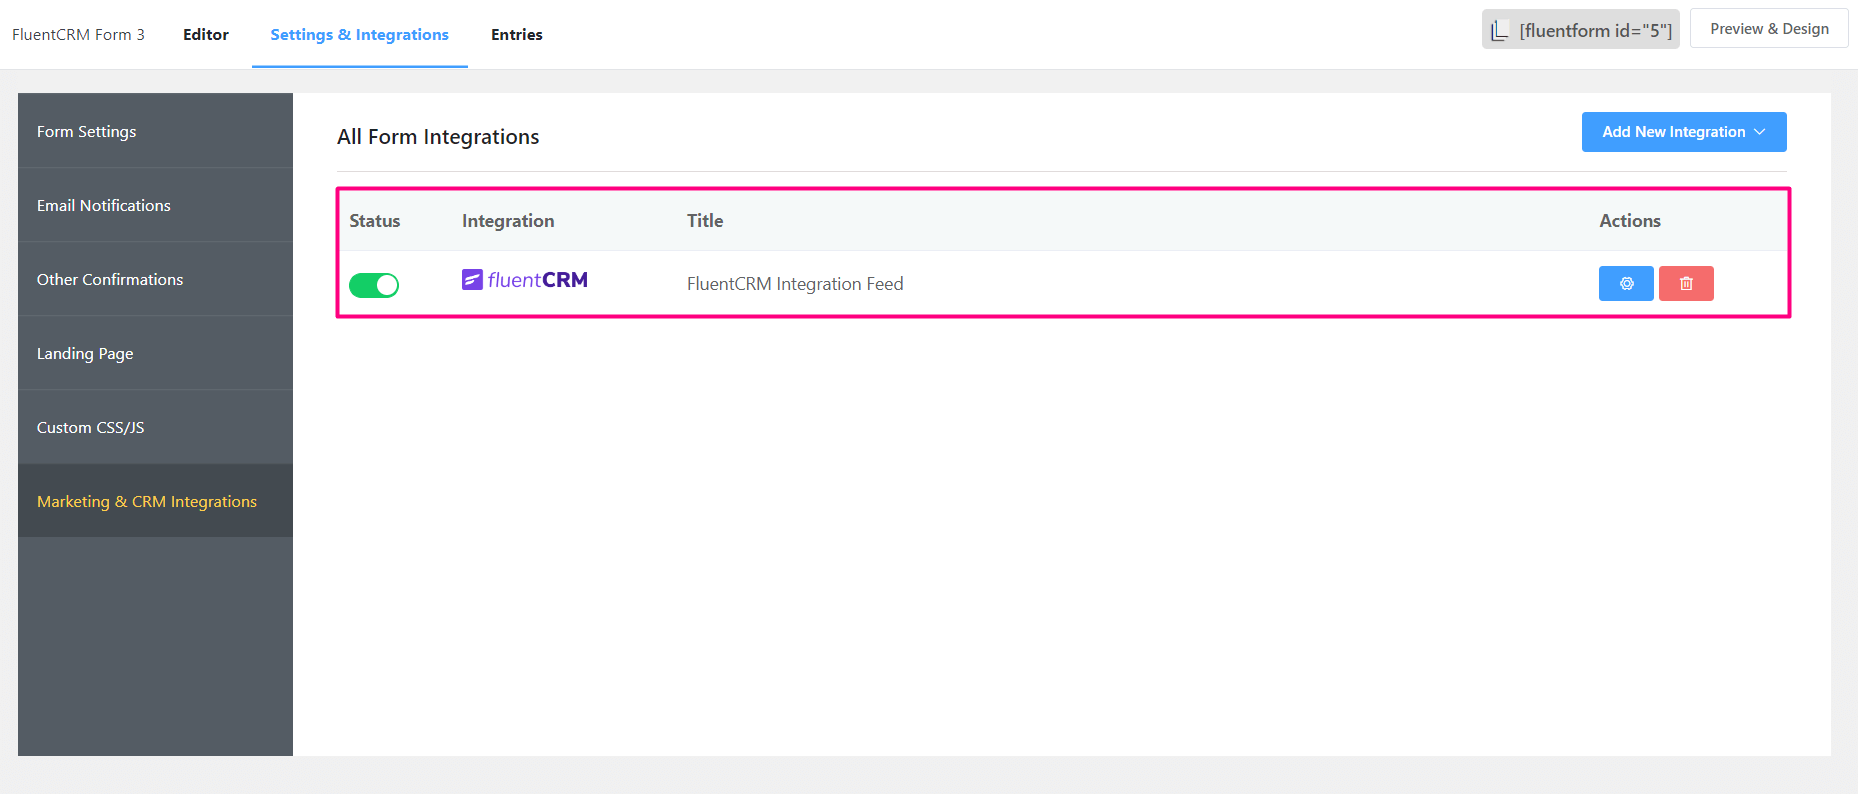
Now let’s configure the FluentCRM Integration Feed by going to Marketing & CRM Integration from the left side. Since we already created this in the earlier tutorial an existing feed is already there. But if you create a Fluent Form manually and later want to connect to FluentCRM then please follow the next steps.
To add a New Feed please hover over Add New Integration and click on the FluentCRM Integration from the options.
Now we need to configure and map some options between Fluent Form Fields and FluentCRM contact data as below.
Primary Mapping
The very important or minimum required fields that need to be selected or mapped are the FluentCRM List that will be assigned to the form submitted contact and the Contact Email Address.
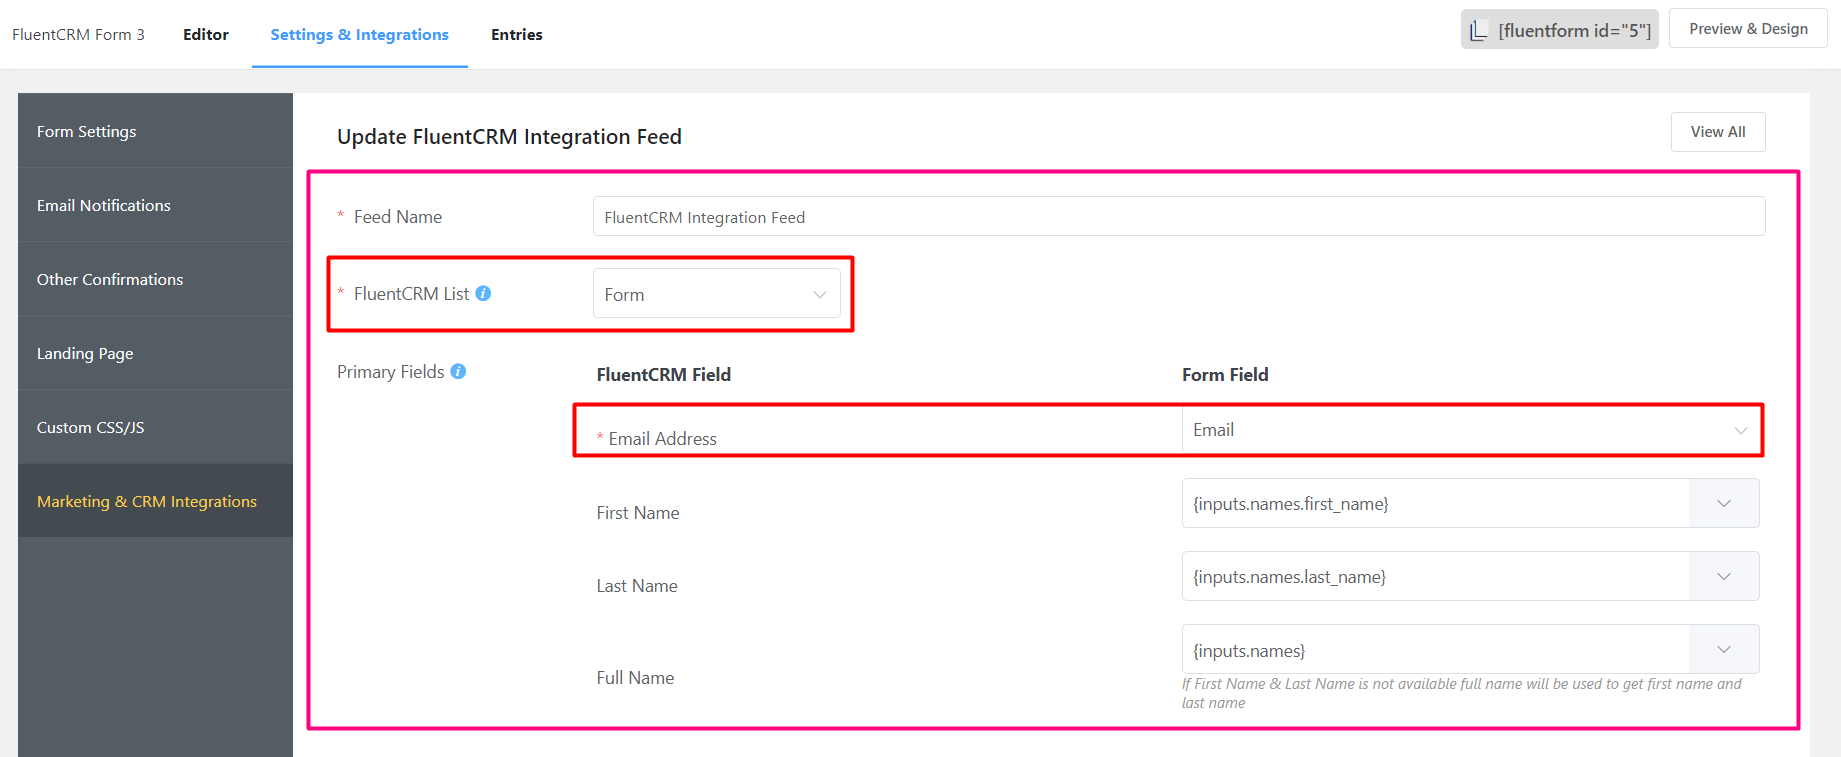
Other Primary Options are:
- Feed Name: Required Name for the Feed as an Identifier.
- First Name: First Name of the contact.
- Last Name: Last Name of the contact.
- Full Name: Full Name of the contact.
Custom Fields Mapping
All the other FluentCRM fields including the FluentCRM Custom Contact Fields will be available for mapping below the basic field mapping. The left side labeling Field Label is the FluentCRM contact fields name and the right side labeling Field Value is being submitted from the user through the subscription form.
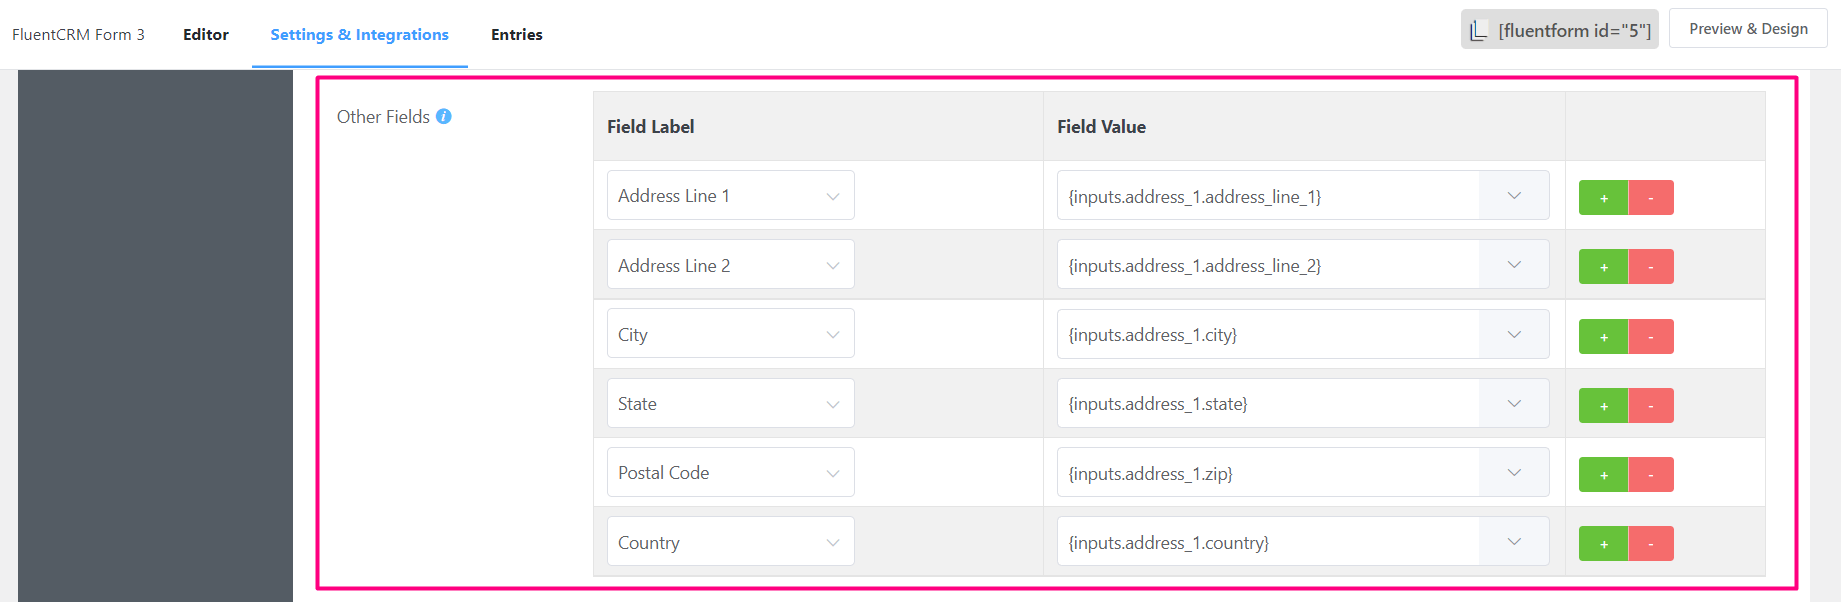
Here we have added a few address fields in the form and mapped those fields according to FluentCRM contact data properties.
Dynamic Tags
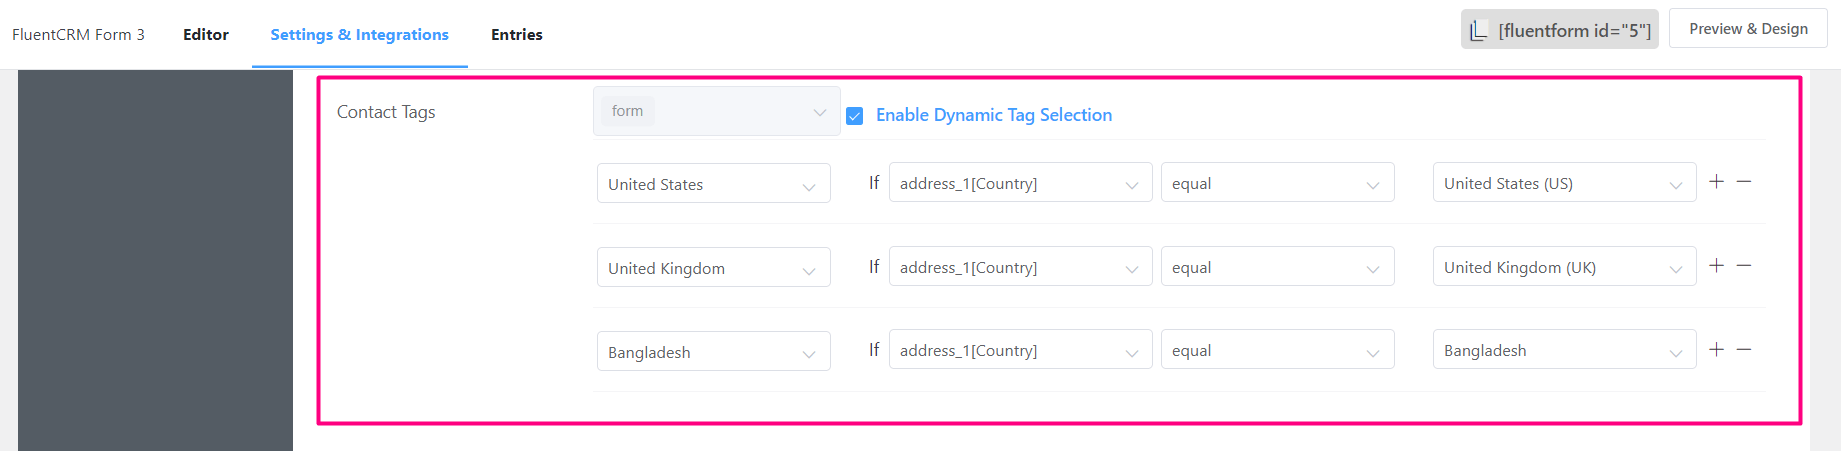
If you have multiple tags in the FluentCRM and you have fields that can take various inputs from the user, then you can assign Tags dynamically based on the input. Below we have assigned tags dynamically based on the Country from the Address fields.
Conditional Logic
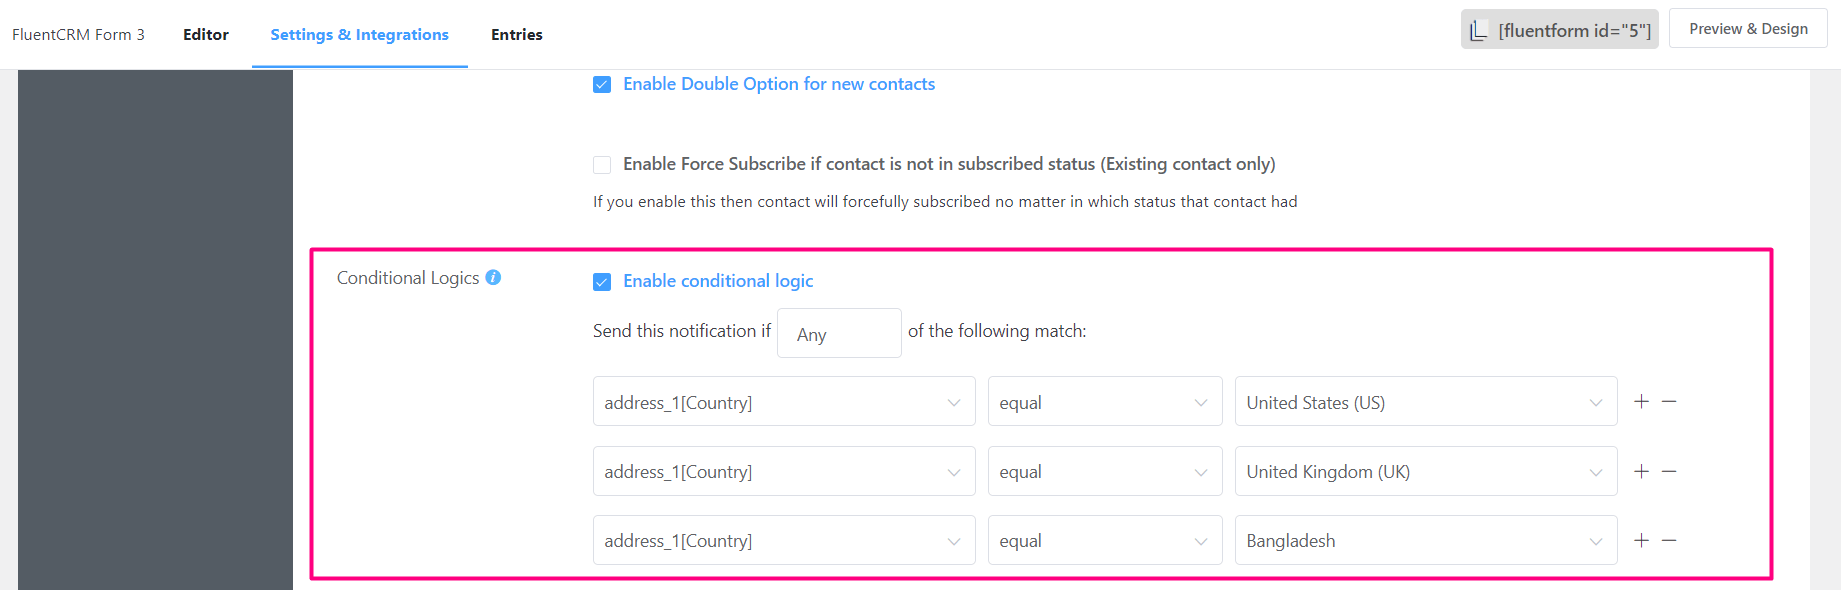
Another useful advanced feature of Fluent Forms Integration Feed is that you can also apply conditional logic based on input and decide if All or Any of the configured conditions. Below we have decided that Submissions from the contacts in the United States, United Kingdom, and Bangladesh are allowed.
Multiple Feeds based on Conditional Logic
In cases, where you want the user to select the Lists they will subscribe to or any other options that are predefined in the FluentCRM already, you may use this Conditional Logic and create multiple Feeds. For example, you let the user select from 3 Lists from the dropdown, radio input, or checkbox. Then create 3 separate FluentCRM feeds and enable conditional logic and set conditions for each list. This way depending on the list selection from the user either of the 3 feeds will be activated and processed.
Miscellaneous
Other available options in the Feed Settings will allow you to
- Skip the Feed Submission if the contact already exists in FluentCRM,
- Enable Double Opt-in for new contacts,
- Enable Force Subscribe if contact is not in subscribed status (Existing contact only),
- Remove Contact Tags and
- Enable or Disable the Feed.
Form Submission
As we have followed instructions in the Form Submission of the Opt-in Forms (Fluent Forms) Basic Configuration we can now Embed Subscription Form, check Entry in Fluent Forms, check the Feed Status, and also check the Contact in FluentCRM as well to confirm that we have followed and configured every step carefully and everything works!
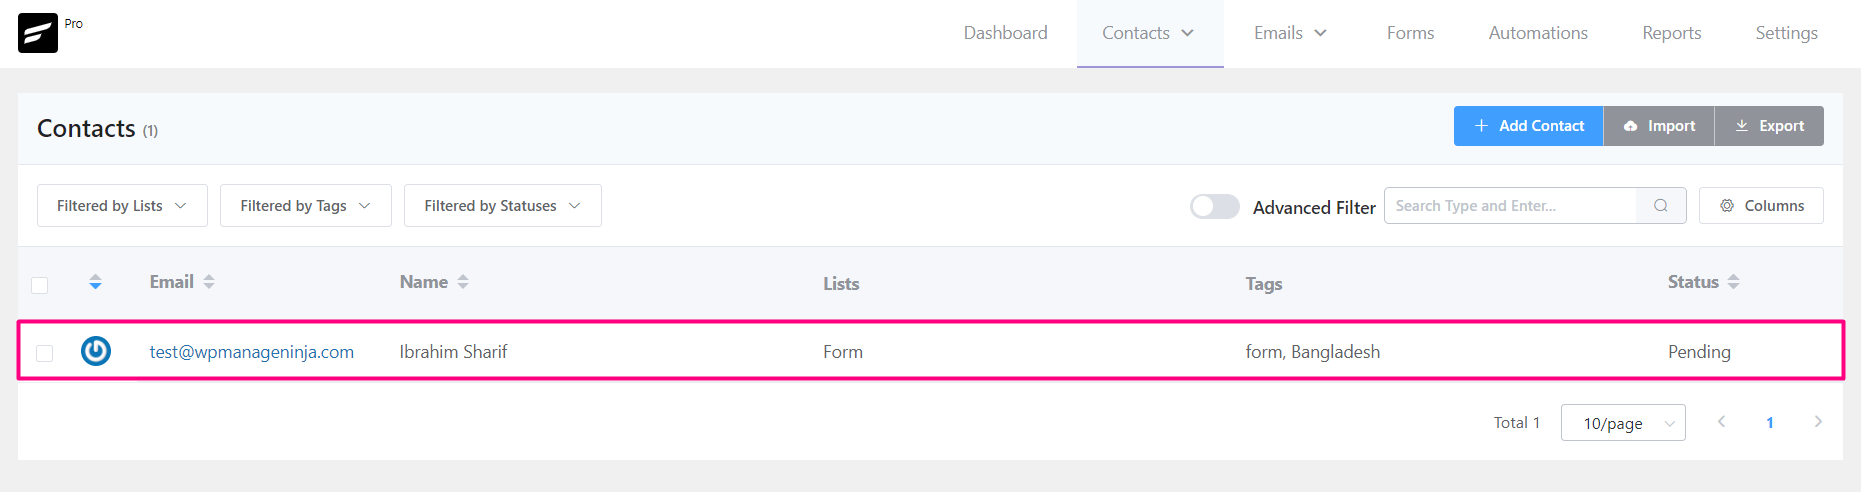
To test out the conditions we just set in an advanced way, The form is submitted with the Country set to Bangladesh with a logged-in user. So
- The Form is submitted for the contact in Bangladesh,
- Double Opt-in for Form Submission processing was not done as the submitter is already logged in to the website,
- Data fed to FluentCRM matching conditional logic,
- Tag Assigned with Bangladesh,
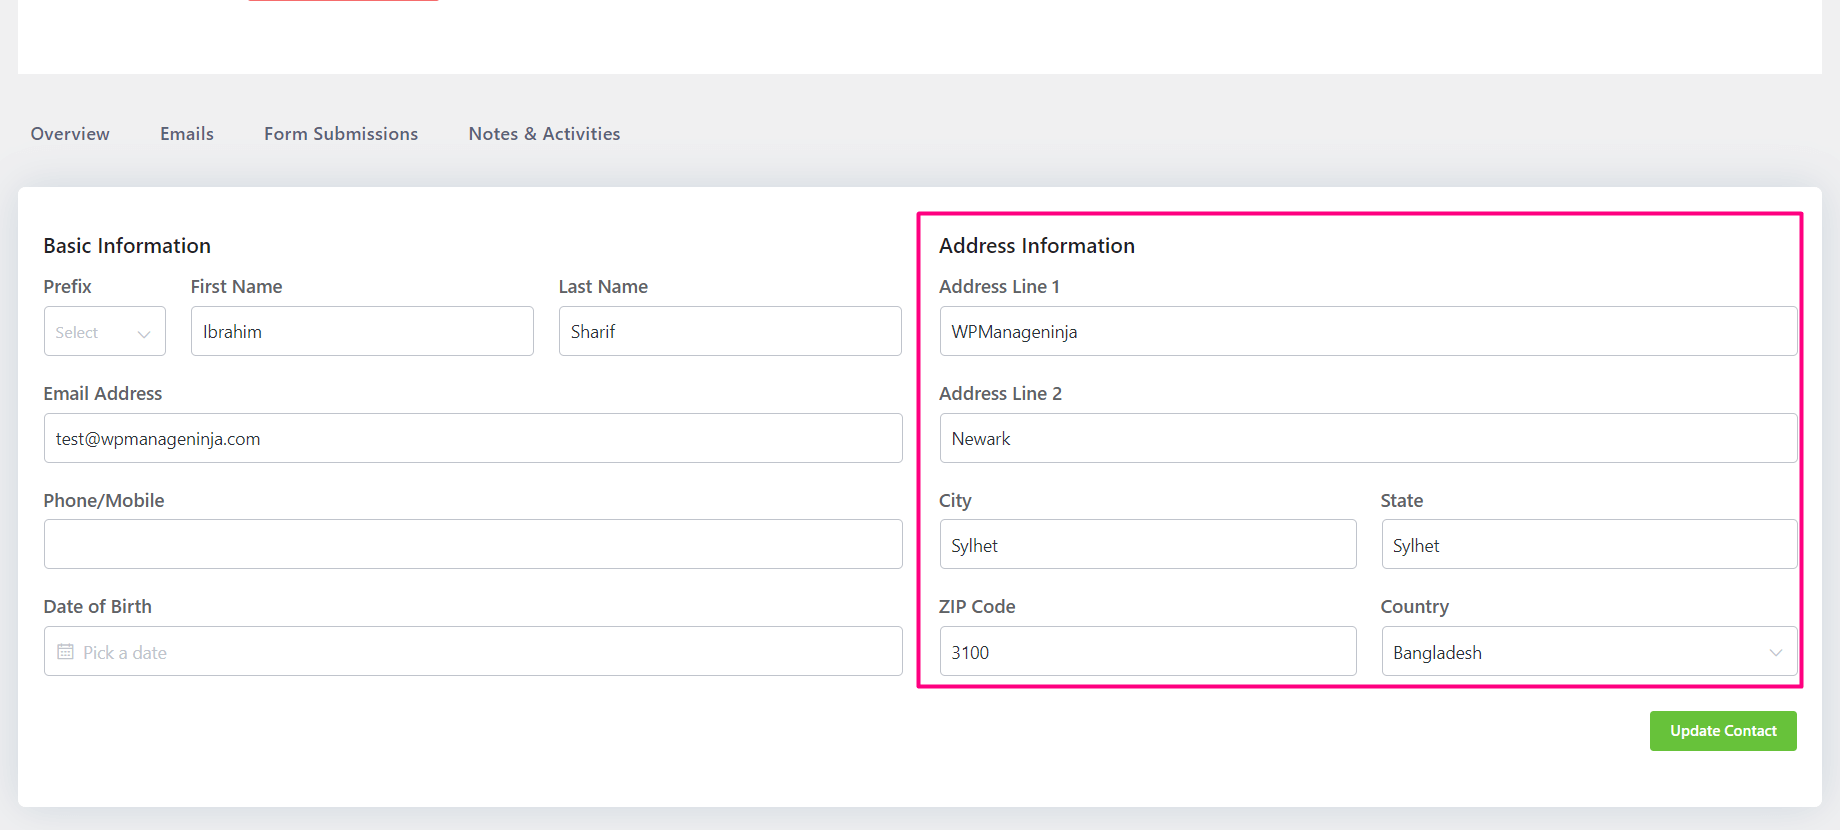
- Address Information that was mapped stored the submitted address information.
That’s all for advanced and extended configuration of Fluent Forms Subscriptions with FluentCRM.


