
Email Marketing & Automation in WordPress is sending automated emails based on your audience’s behavior and automating various tasks inside the WordPress website that are initiated upon different activities and triggers. It lets you turn your leads into customers and customers into brand advocates who’ll rave about you whenever they can! Email Marketing Automation is a marketing cylinder or funneled workflow where your leads can get into a relationship with your business starting from different activities.
FluentCRM is a tool that automates tasks and runs emails such as Email Campaigns, Email Sequences & Custom Emails.
This article will give you a detailed walkthrough of the Marketing Automation, Sales Funnel & Email Sending based on specific activities from FluentCRM.
Glossary
Before we dive deep into FluentCRM and Automation, Let’s learn some terms that are very important to know and frequently used.
- Automation Editor: The editor where you will be able to add, edit or modify your desired actions or activities in automation. To know more about this please visit Automation Editor.
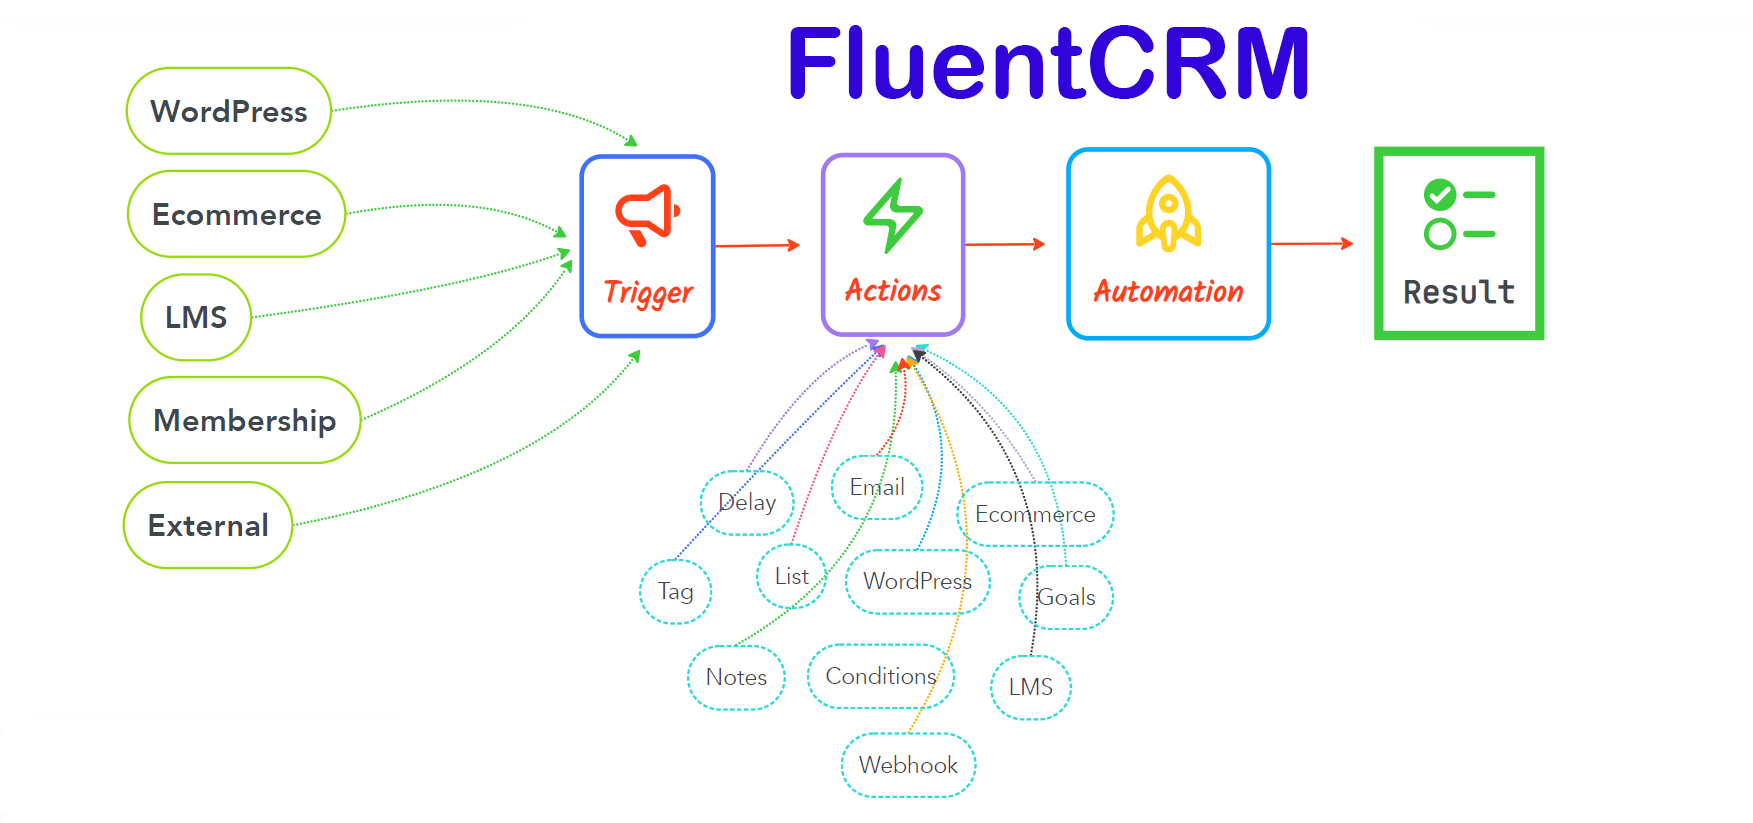
- Triggers: Triggers are essential for initiating email marketing automation. There are a lot of triggers that can start or initiate automation in FluentCRM such as Primary Automation Triggers, Ecommerce Triggers, WooCommerce Subscription Triggers, Membership Triggers, and LMS Triggers.
- Actions: Once an Automation is initiated you can add various actions that you want to run when such activities are triggered like Primary Actions, WordPress Actions, Email Actions, Goals or BenchMark Actions, LMS Actions, Miscellaneous Actions, and Conditional Automation Actions.
- Goals: Generally FluentCRM automation starts with a single and specific trigger. What if you want to run the same automation triggering based on another trigger? This way you could also benchmark the automation. To know more about this please visit Goals or BenchMark Actions.
- Conditionals: One of the most useful features of FluentCRM is that you have advanced and more control over what you want to do or customize your target more with the flexibility of the FluentCRM data. Please visit Conditional Automation Actions to learn more about such flexibility in using data-based conditions in automation.
Dashboard Overview of Automations
To learn all the details about the Dashboard of FluentCRM Automations, read the instructions below –
You can access the Dashboard of Automations section from both the Left Sidebar and the Navbar in the FluentCRM plugin.
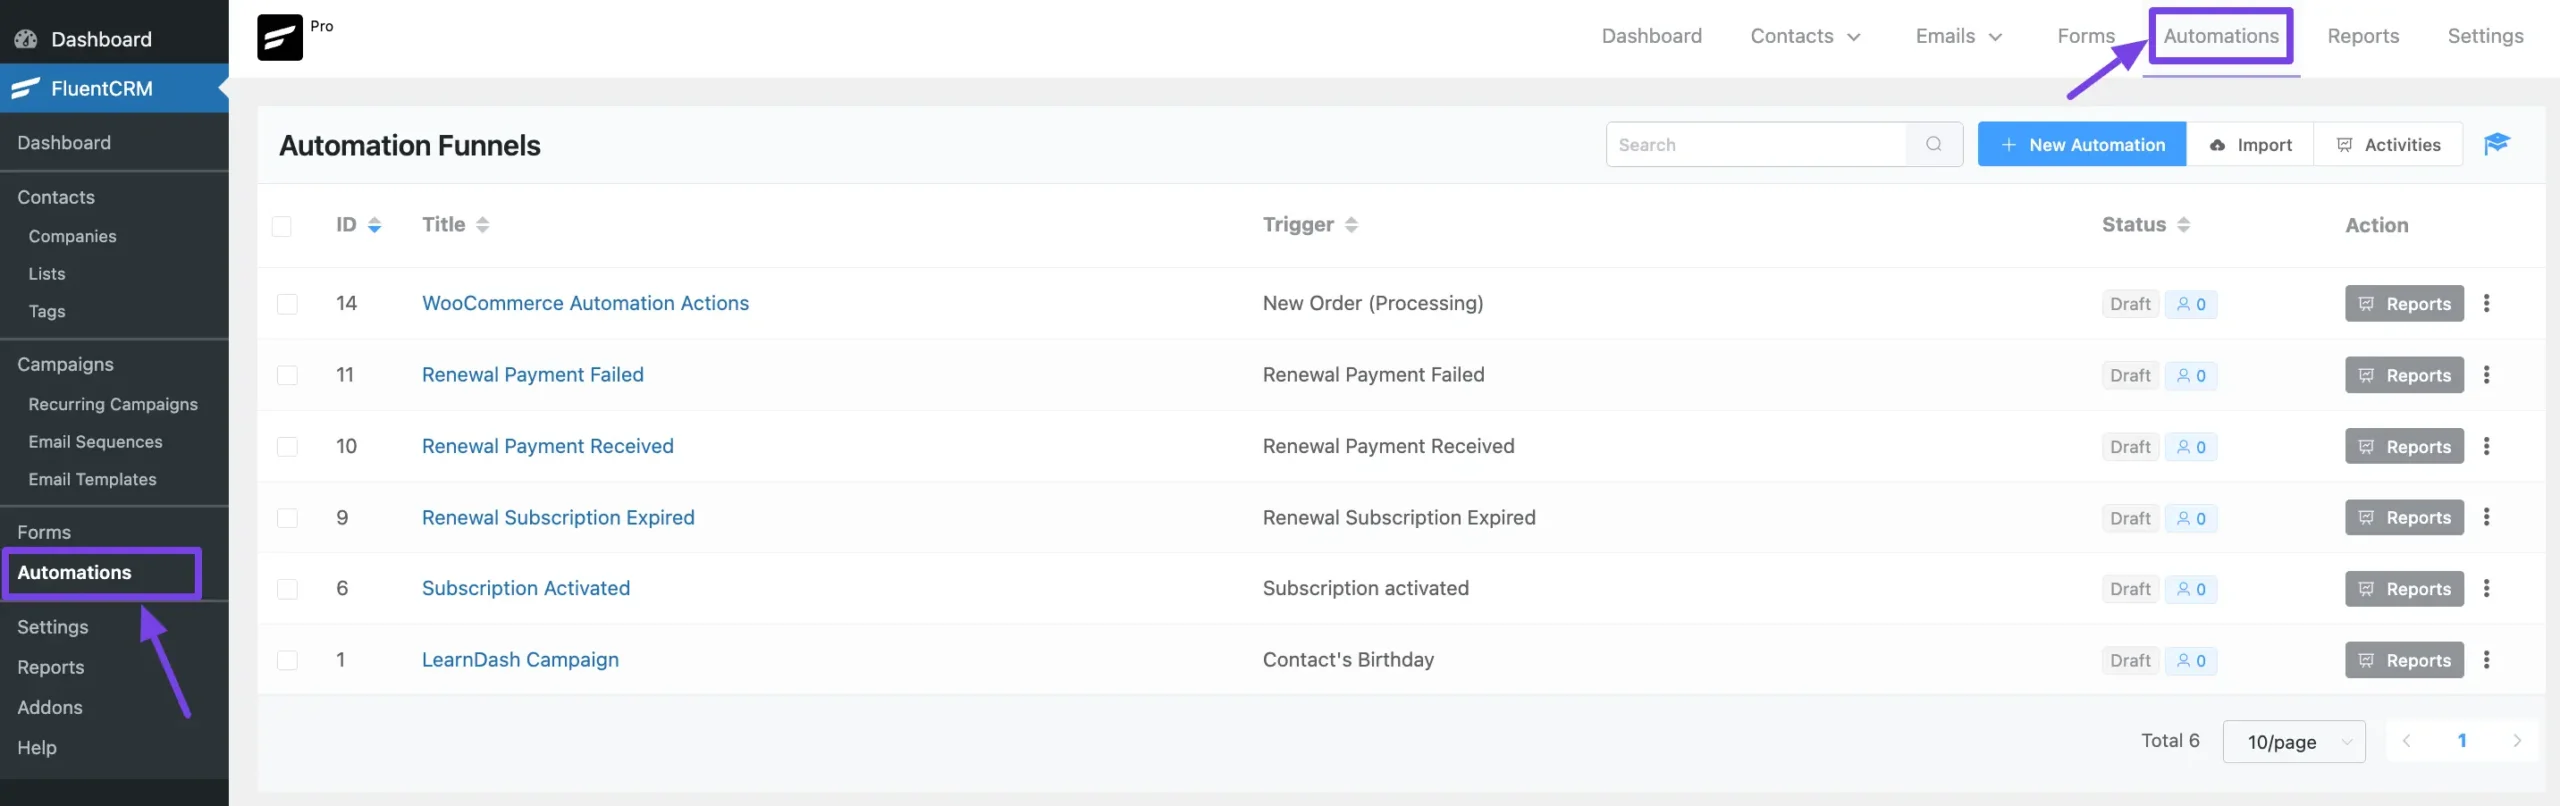
Once you go to Automations, you will get all the available options for creating and managing Automation Funnels as per your needs.
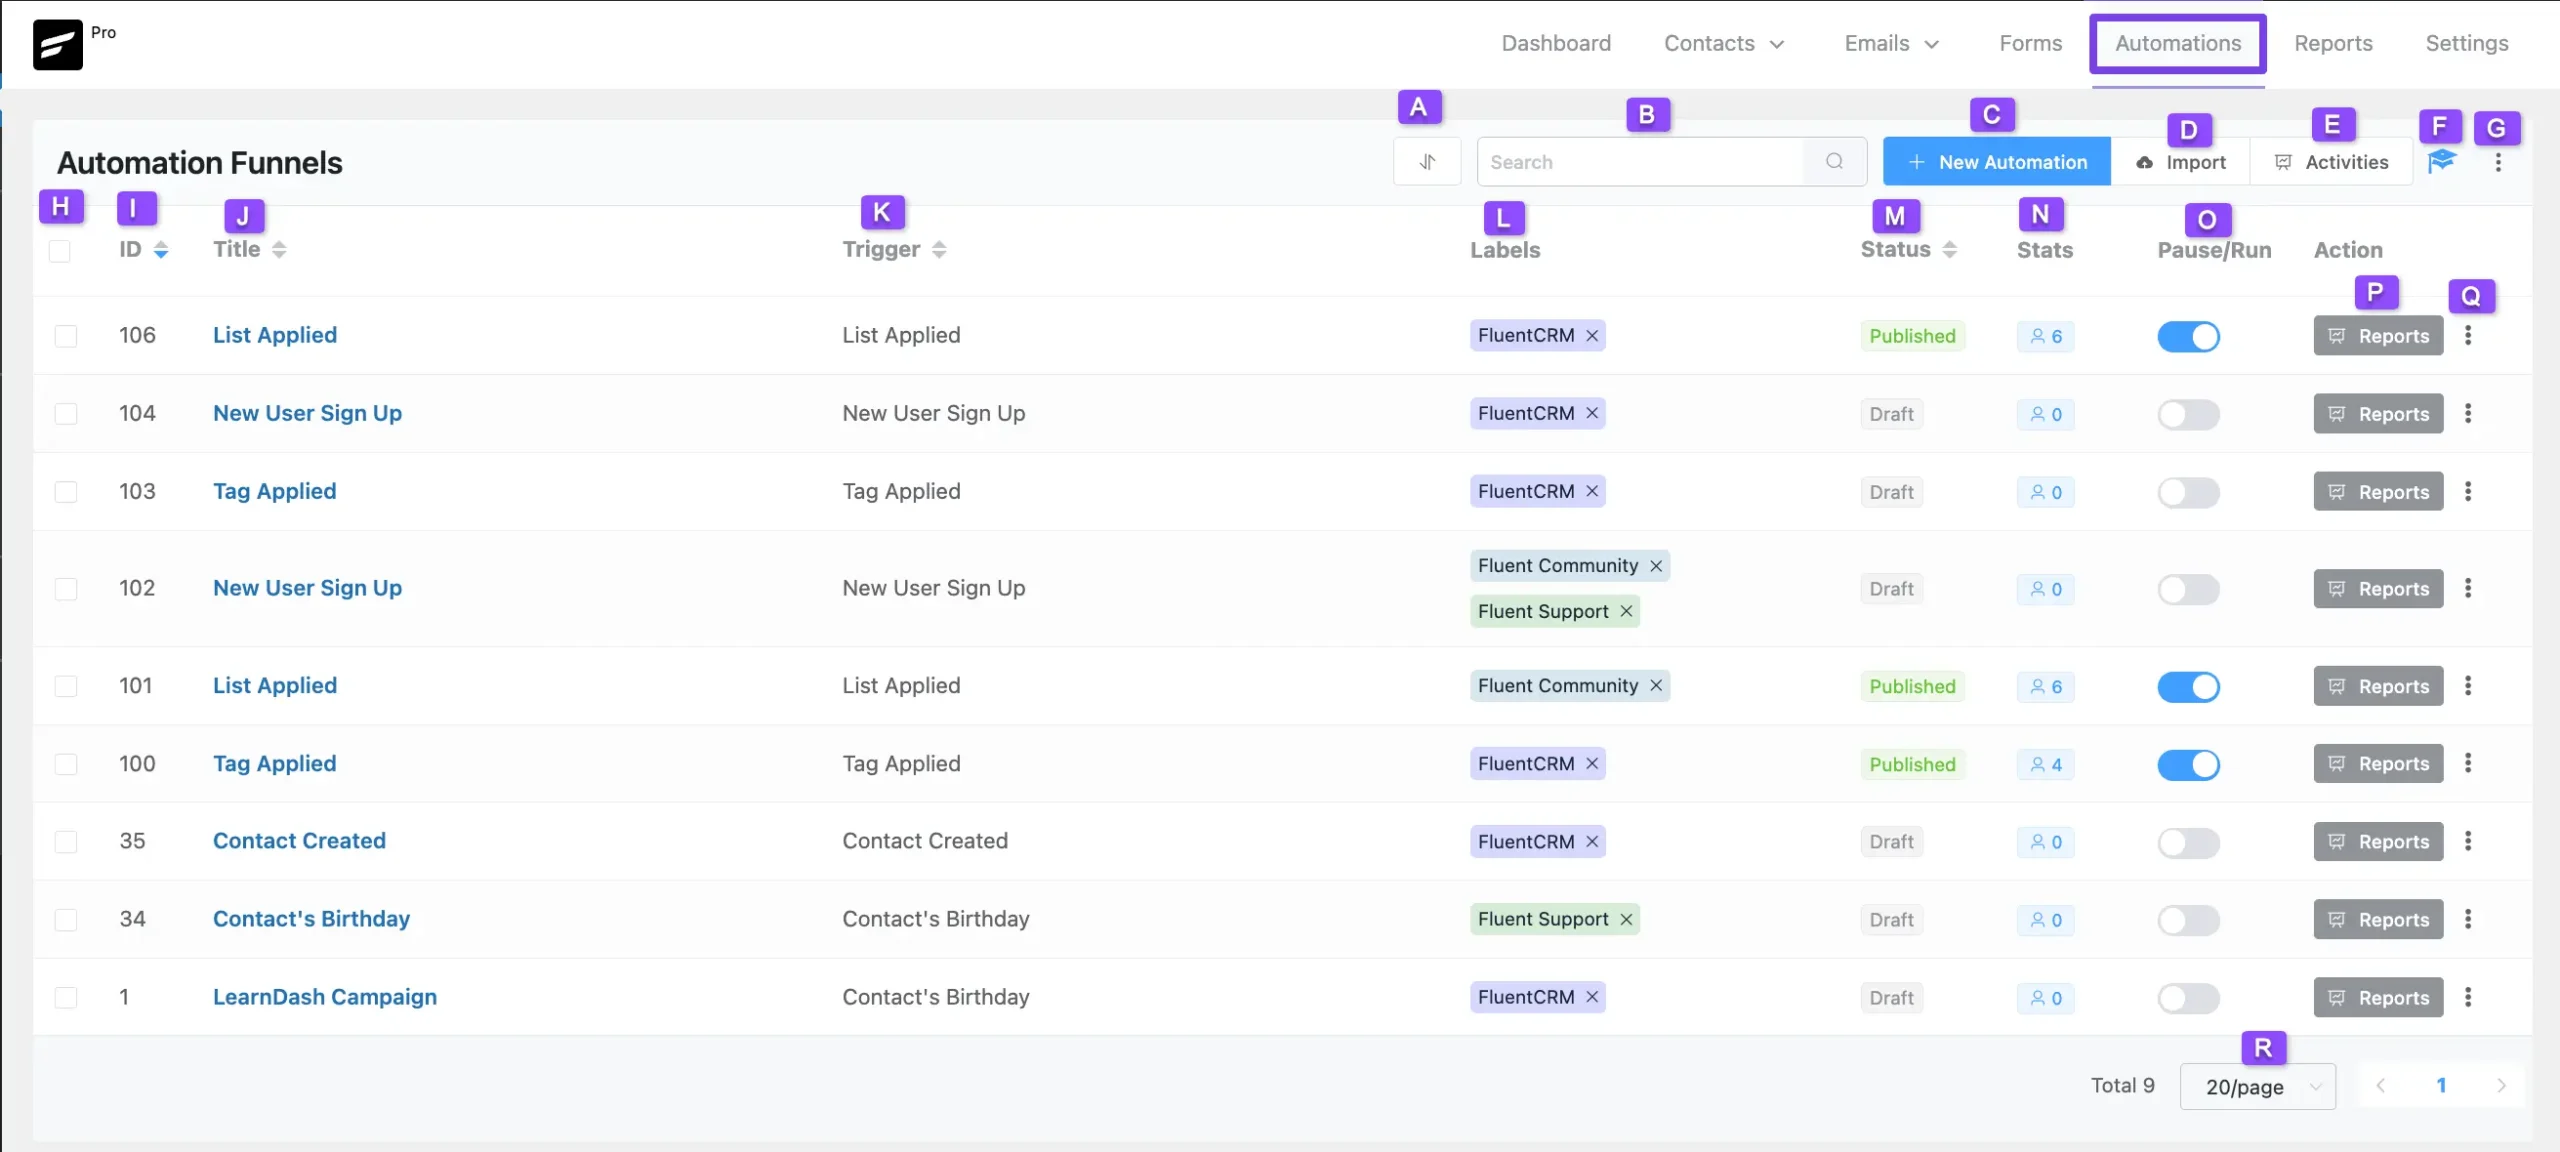
All the options mentioned above to manage the automations are explained below –
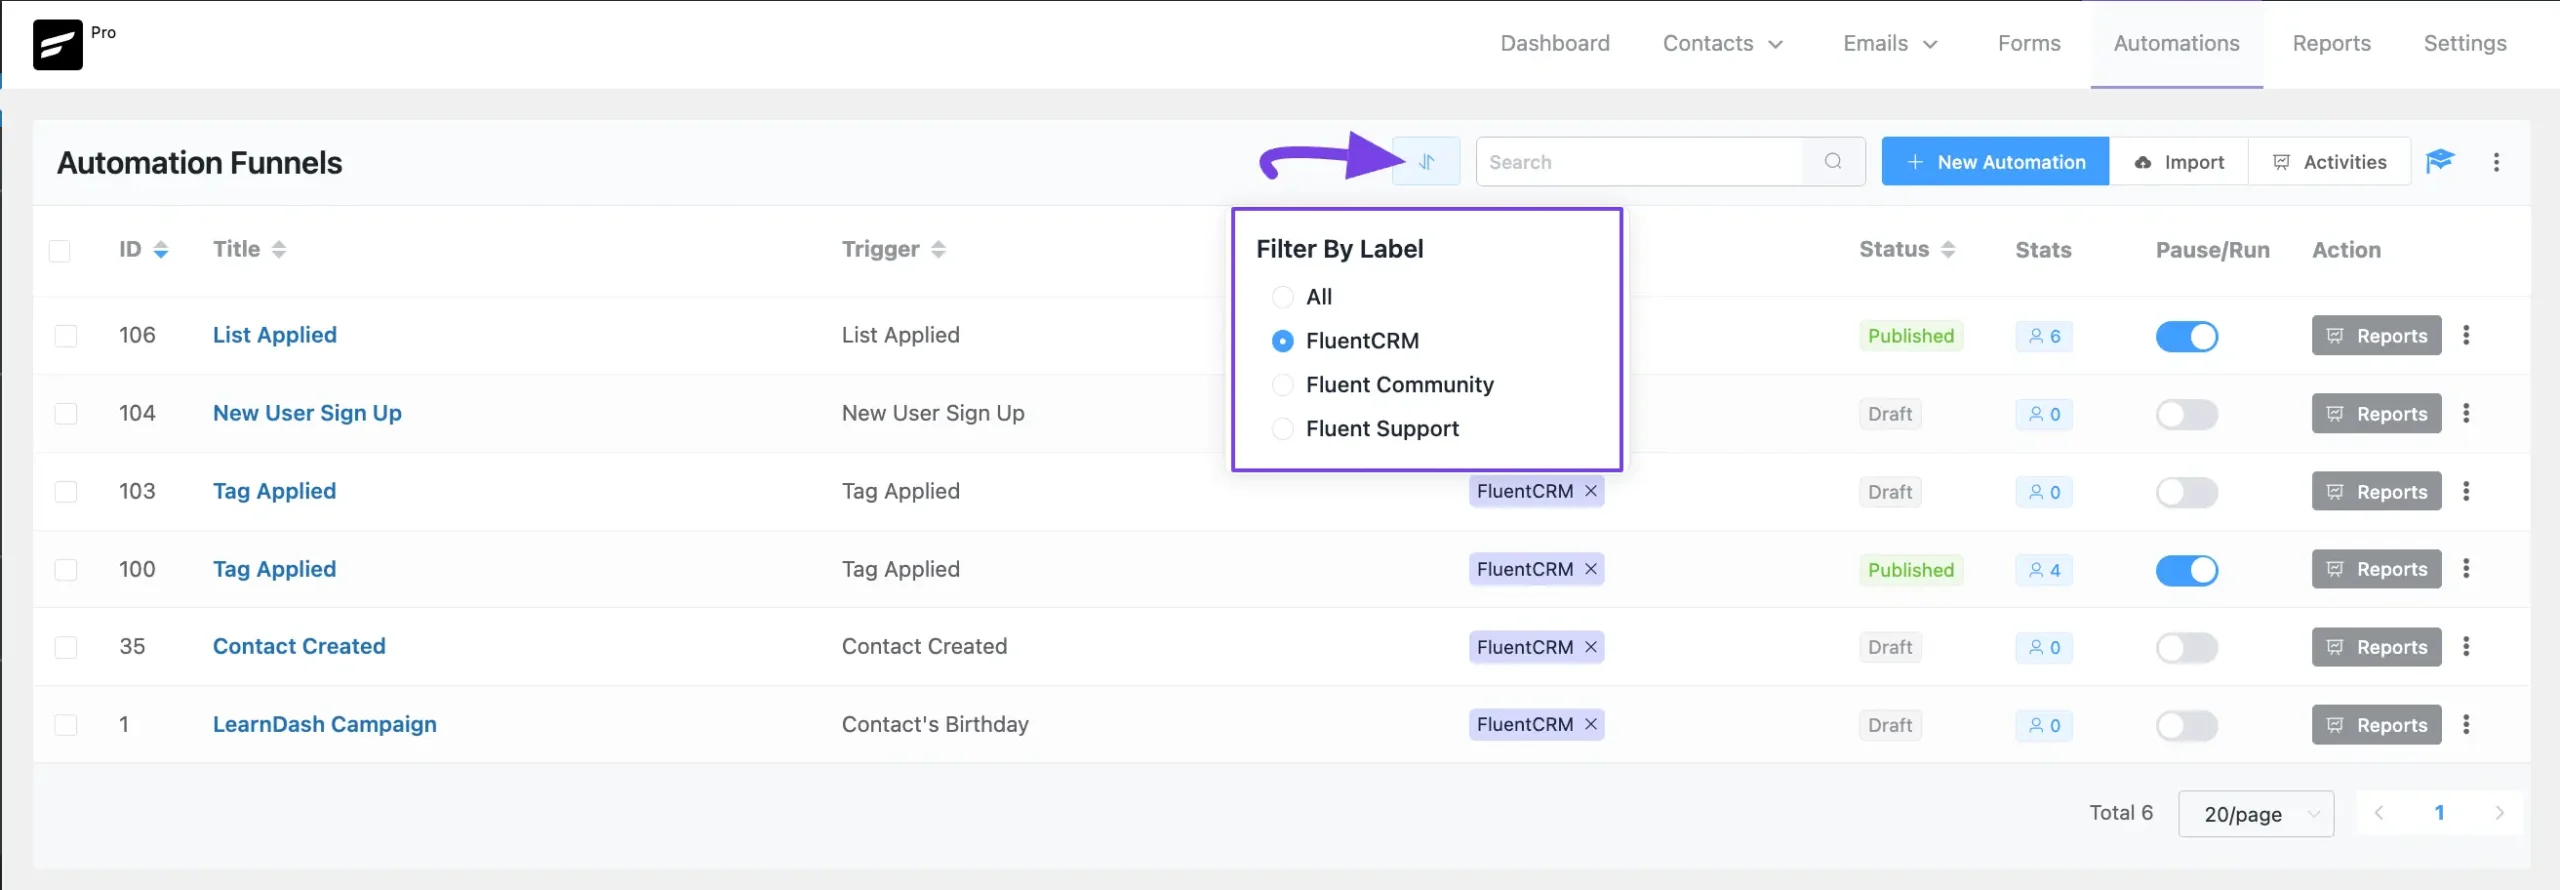
A. Filter By Label
This option allows you to filter the list of automations by the selected label.
For instance, I selected the FluentCRM label, and all automations with that label appeared.
To learn the process of creating Labels for Automations, read this Documentation.
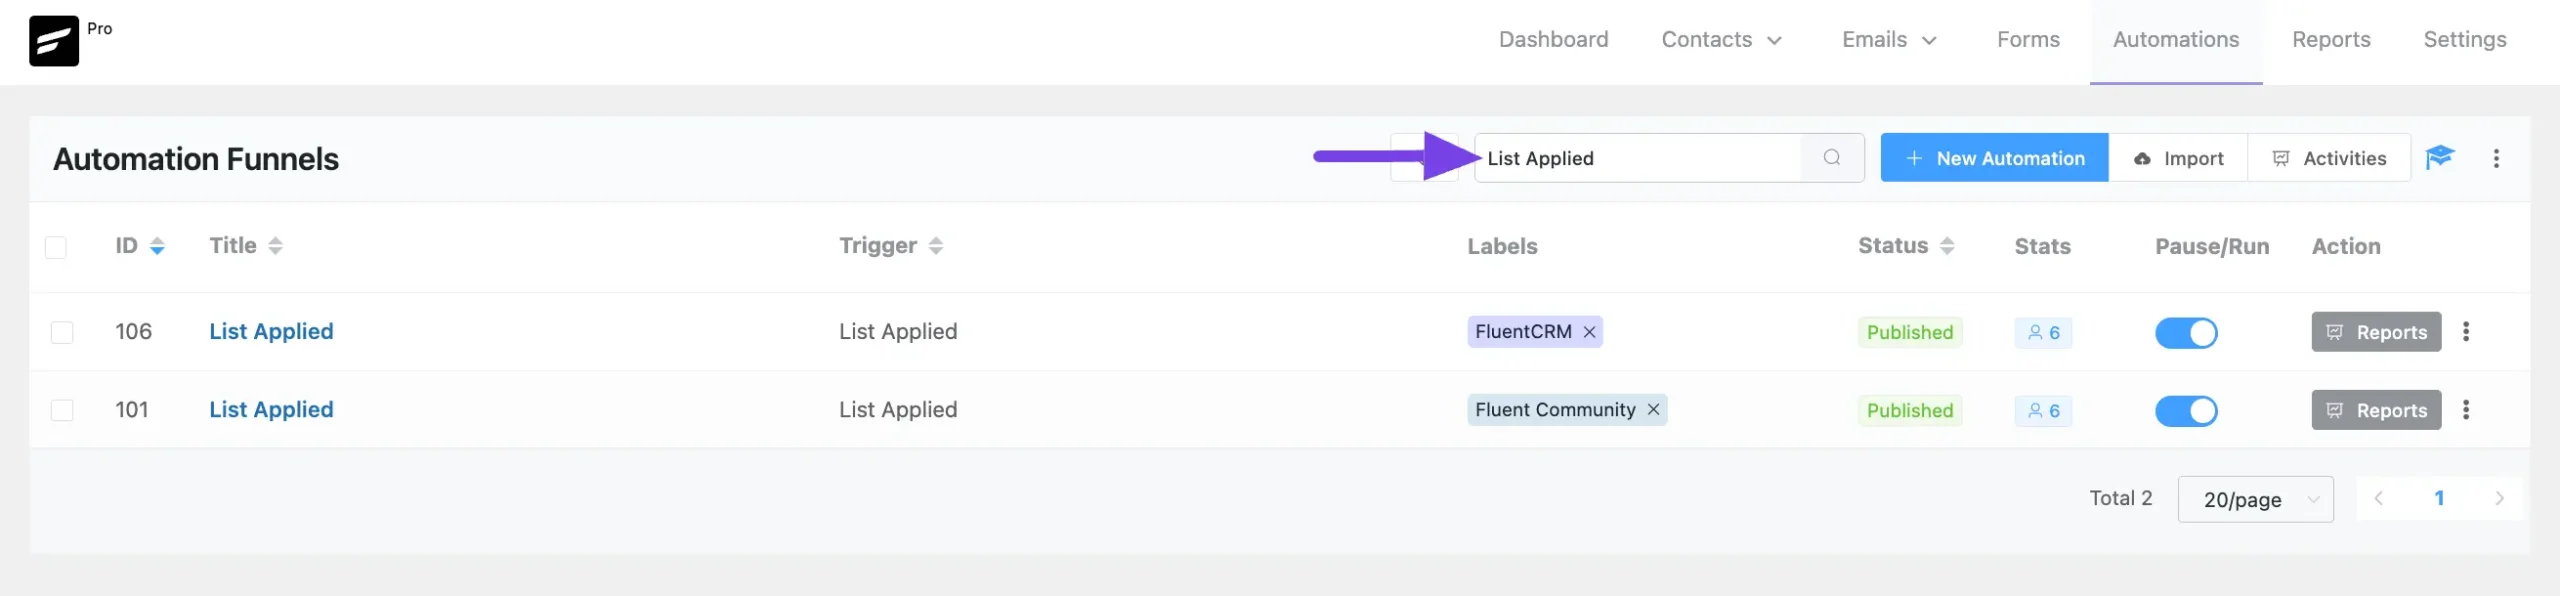
B. Search Box
This option lets you search for specific automations by their Titles.
For example, I searched for automations using the “List Applied” title.
C. + New Automation
By clicking this button, you can create as many new automations as you need.
To learn the process of creating new automations, read this Documentation.
D. Import
Using this option, you can import any automation/s at any time.
To learn the process of importing automations, read this Documentation.
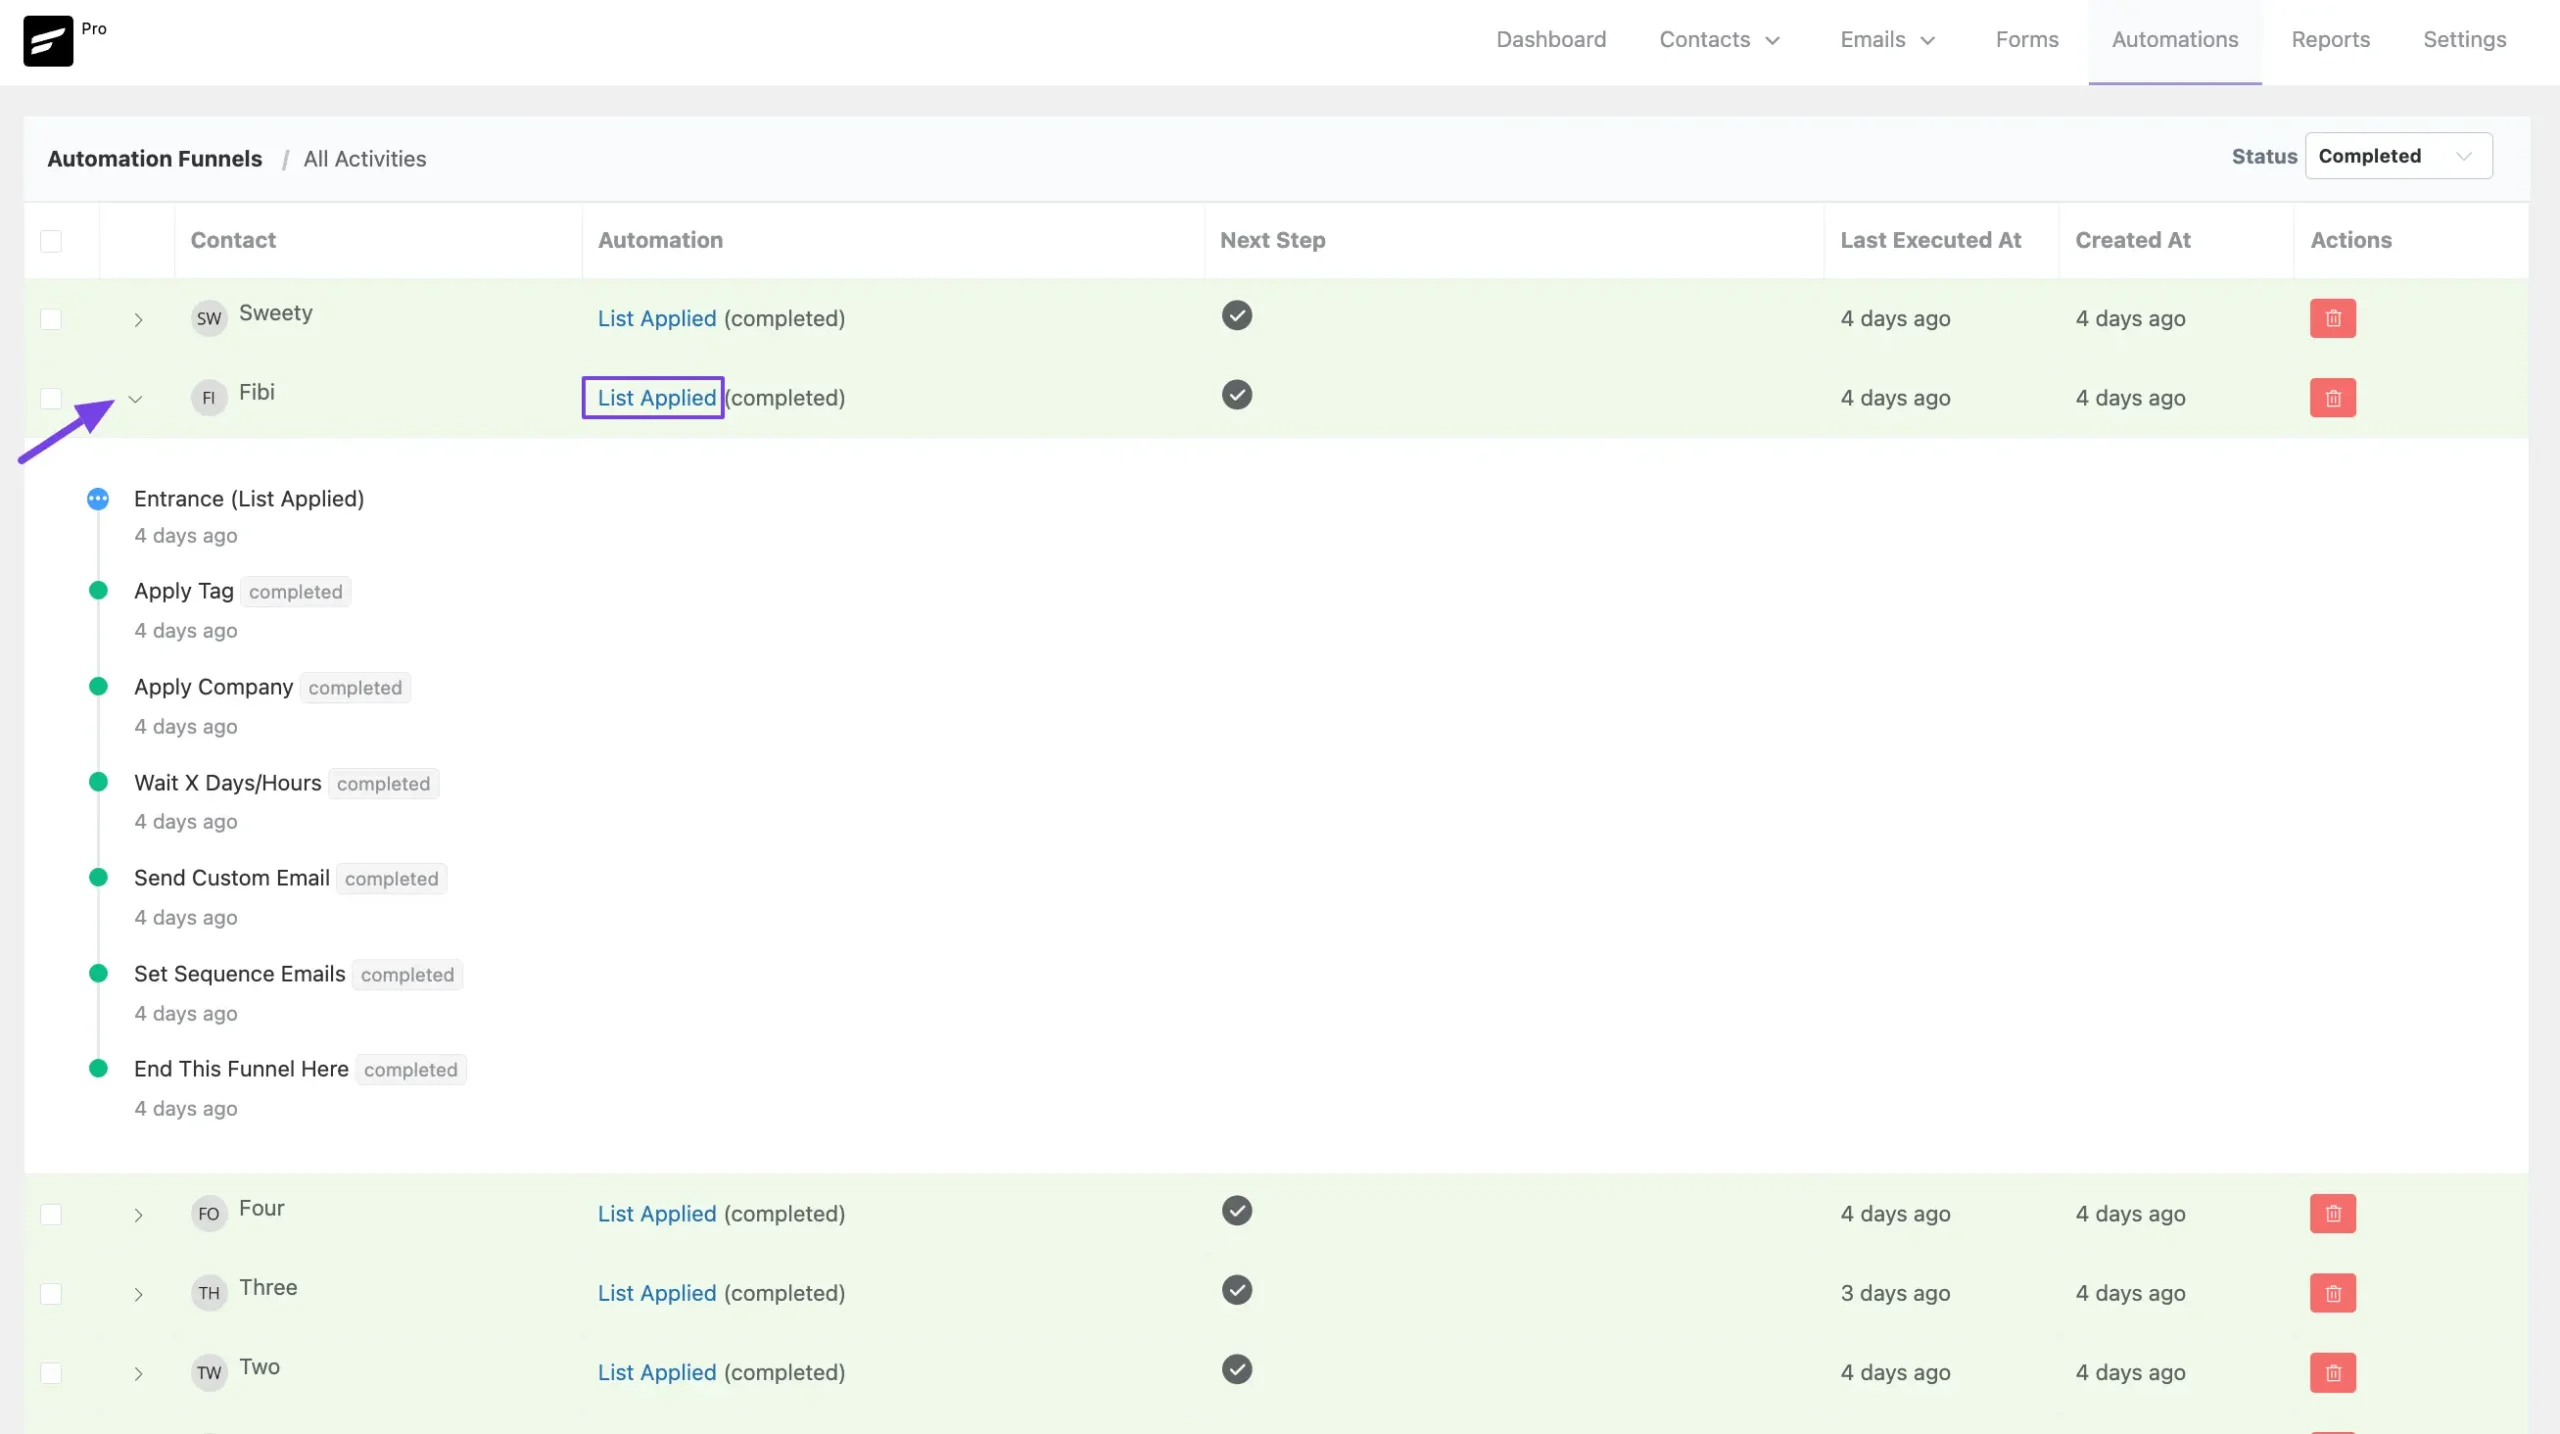
E. Activities
This option lets you keep track of the overall activities of your all automations.
To view individual activities, click the arrow icon next to each activity. Plus, to see the complete funnel for a specific activity, click its title under the Automation column.
To learn the detail use of viewing individual activities, click here.
F. Guideline Resource
This button will open a sidebar on the right-hand side with the documentation to introduce you to the basics of FluentCRM Automations.
G. Manage Labels
By clicking this button, you can create as many Labels as you need to sort your automation.
To learn the process of creating Labels for Automations, read this Documentation.
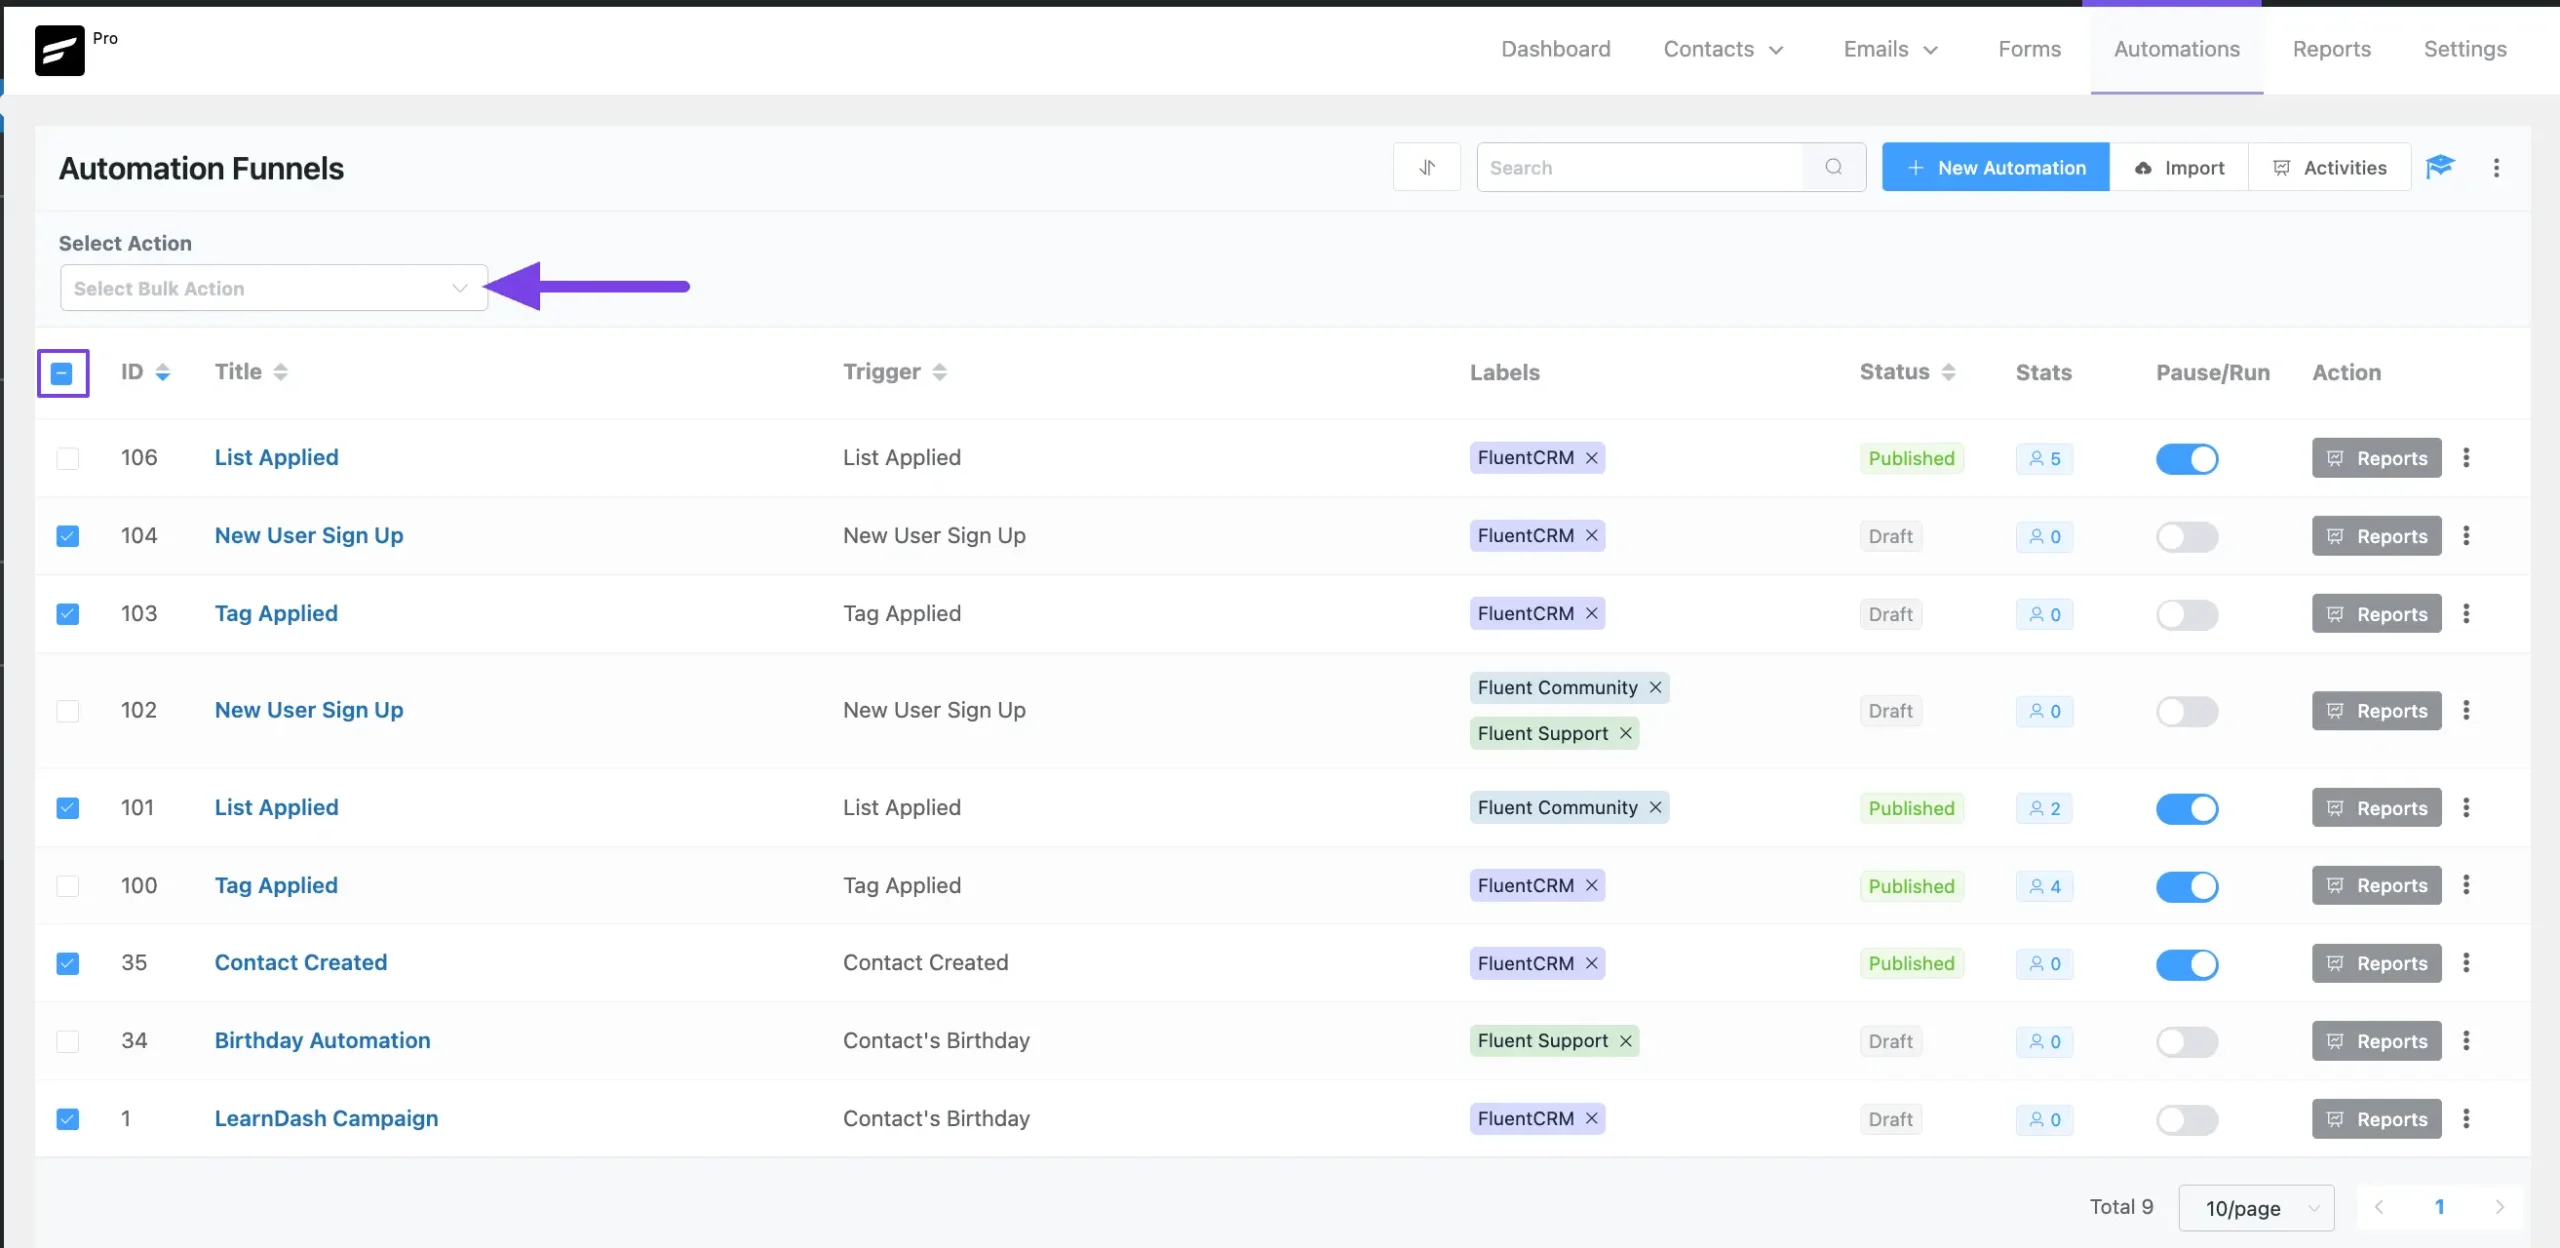
H. Bulk Actions
This option lets you apply the Bulk Actions for the selected Automation/s.
Click the Checkbox (single or multiple), to run the desired action for all of the selected automations.
Here, you will get the following three actions to perform.
- Change Funnel Status
- Apply Label
- Delete Funnels
Plus, to select all the automations at once, click the Checkbox in the top left corner beside the ID.
I. ID
Under this option, you will get the unique ID number for each automations that you created.
J. Title
Under this option, you will find the Title of all the automations you created which will help you to find your automation later easily.
K. Trigger
Under this option, you can see the Triggers that you used for your Automations. Triggers are the initial activities that start the automation.
FluentCRM offers the following triggers for the automations:
- Primary Automation Triggers
- E-commerce Triggers
- WooCommerce Subscription Triggers
- LMS Triggers
- Membership Triggers
L. Labels
Under this option, you can see the Labels that you applied for your Automations.
To learn the process of creating Labels for Automations, read this Documentation.
M. Status
Under this option, you can see the Status of all the automations (i.e., whether the automation is Published or Draft).
N. Stats
Under this option, you can see all the Statistics of all automations (i.e., how many Users/Contacts entered into this automation).
O. Pause/Run
Enable this toggle, to publish and run your automation. Otherwise, your automation will be saved as a draft only.
P. Reports
By clicking this button, you can check overall Reports for the Automations.
To learn more details about viewing reports, read this Documentation.
Q. Three-dot-icon
Once you click this icon, you will get another three more options. These are:
- Duplicate: By clicking this button, you can duplicate any existing automation.
- Export: Using this option, you can export any target automation.
- Delete Automation: You can delete any existing automation by clicking this trash icon. Plus, to delete all reports at once, click the Checkbox in the top left corner and press the Delete Selected Contacts button.
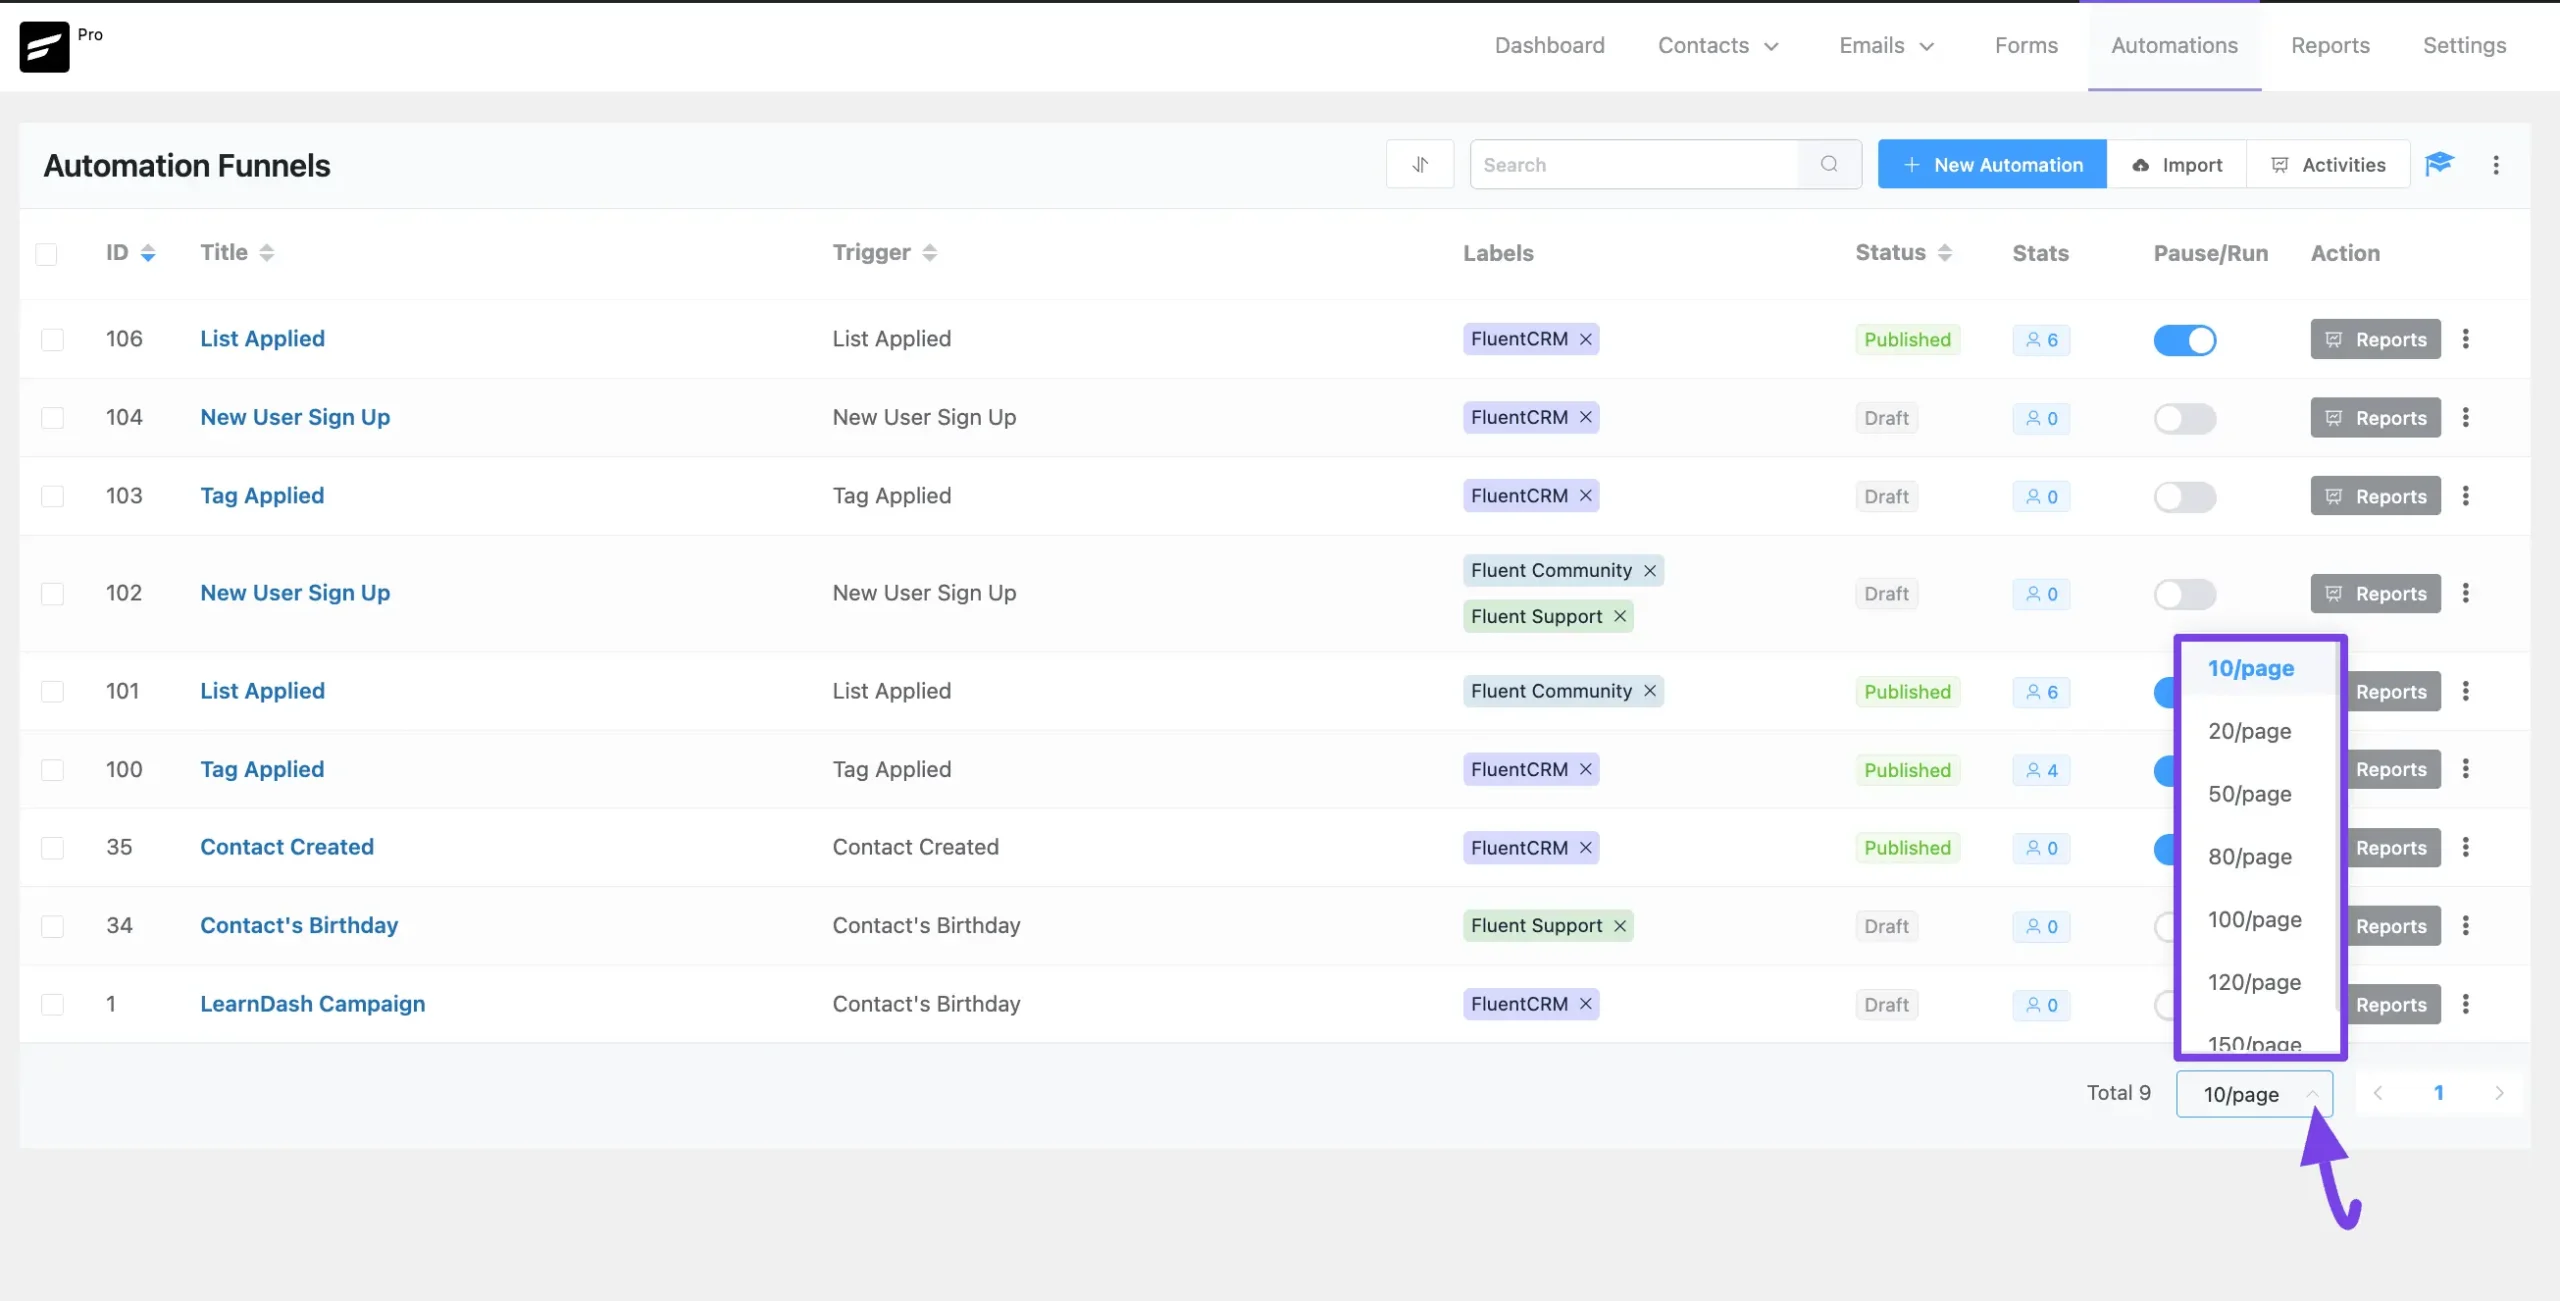
R. Pagination
Using this dropdown option, you can set how many automations you want to display per page.
Few Useful Guidelines
Our team prepared a few videos showcasing how automations work inside FluentCRM. You can watch them to get a clearer understanding of FluentCRM automations.
That’s all as an introduction or overview of FluentCRM automation. Please review the relevant elements to learn and start working with FluentCRM automation to build your own funnel in the WordPress website.


