Table of Contents
- Create a topic in Amazon SNS
- Configure Amazon SES to send bounce information to FluentCRM
- Viewing Bounced Contacts
Using Amazon SES, you can track the invalid email and mark them as Bounced. Amazon will track the delivery status of the email and if it failed to reach the recipient’s mail server, it will be marked as Bounced in your audience status so that you can exclude them in the future campaign.
*Tutorial: How to Configure Amazon SES with FluentCRM
Create a topic in Amazon SNS
1. Go to Amazon SNS console.
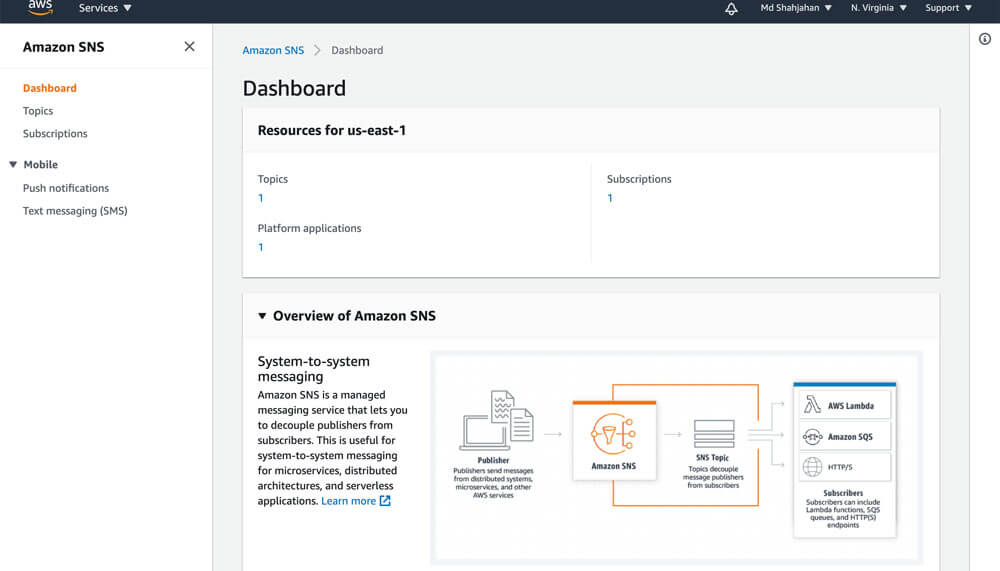
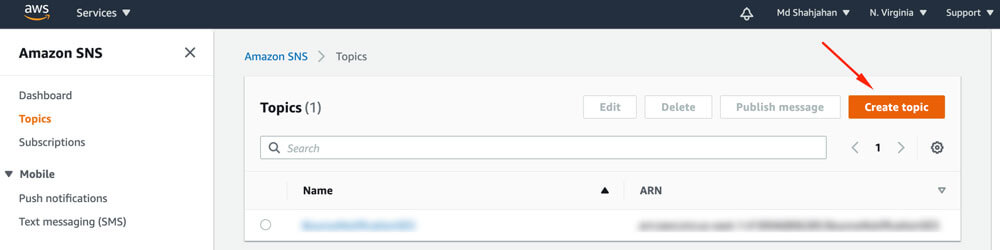
2. Choose Create topic.
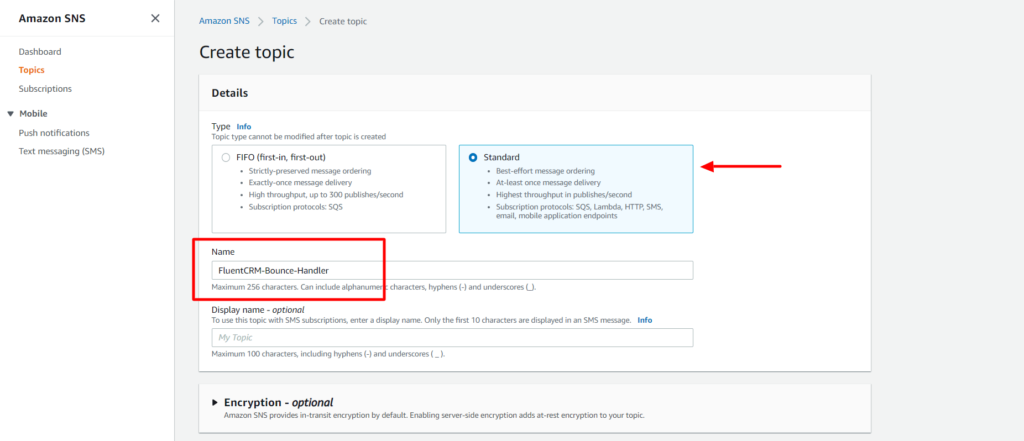
3. Select the Type Standard enter a name for the Topic, click on Create topic button..
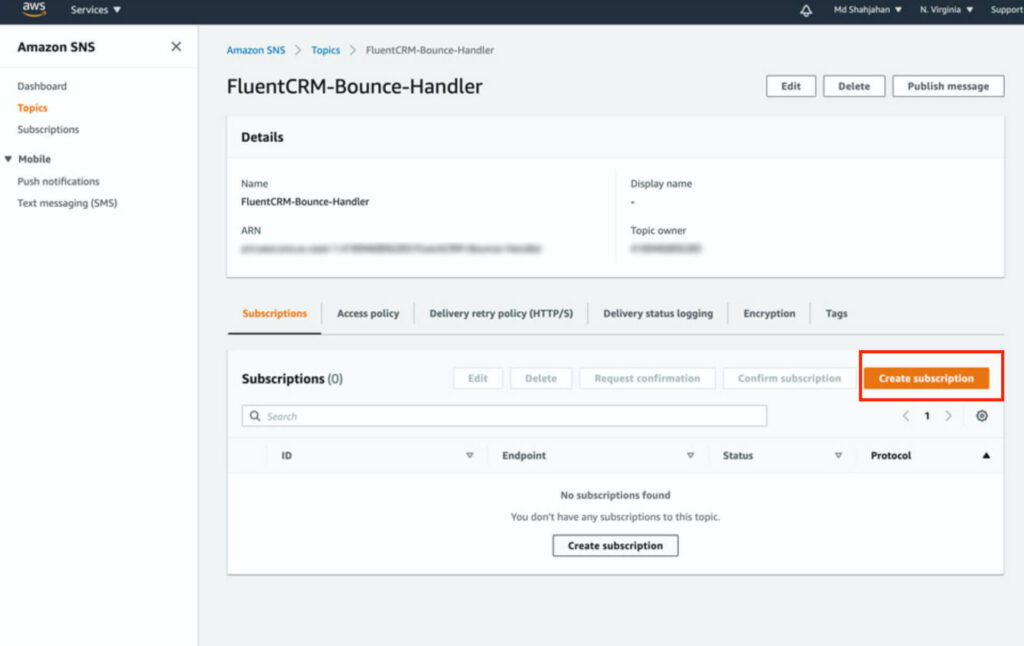
4. From the Topic details of the topic that you created, navigate to Subscriptions, and then choose Create subscription.
5. The topic will be pre-selected, in the Protocol select http or https (based on your server’s SSL status).
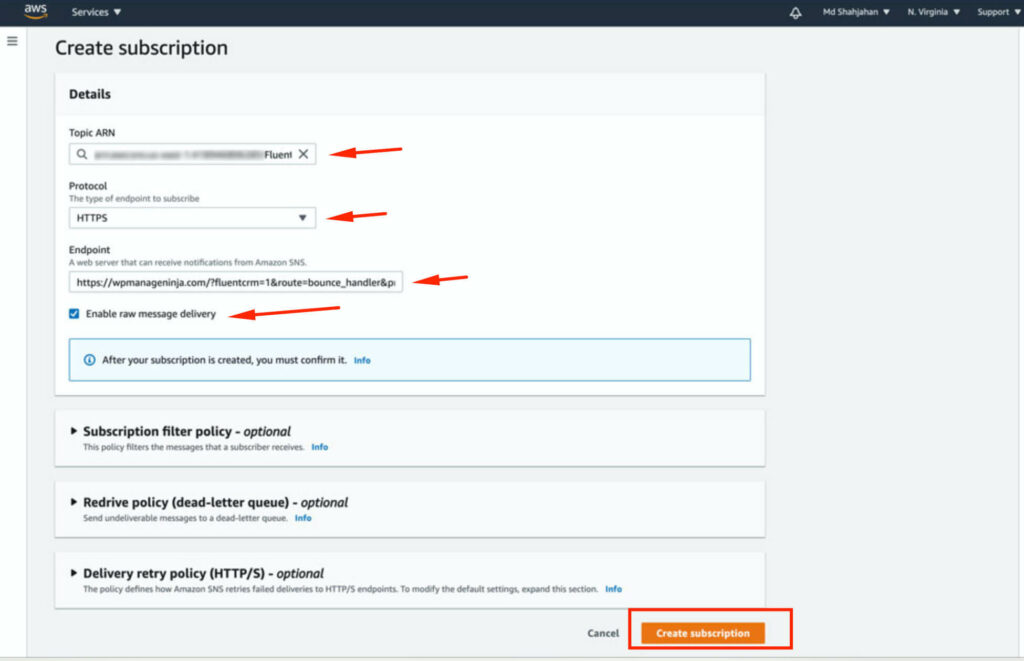
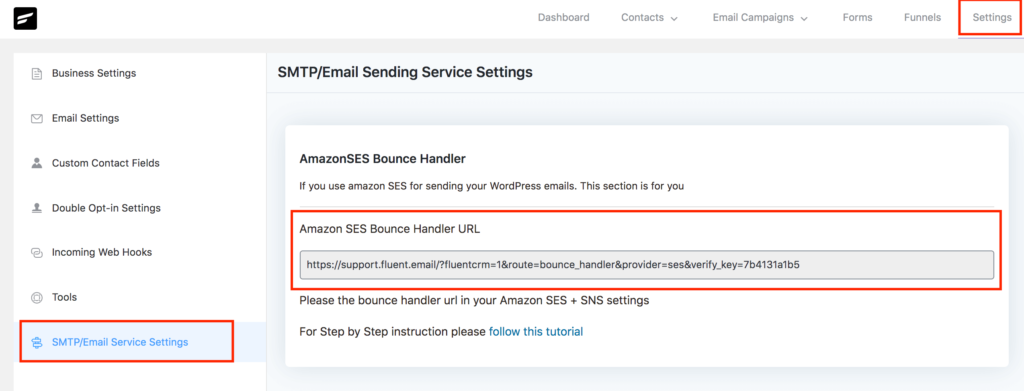
In Endpoint, you need to give your FluentCRM’s endpoint, grab the URL from your FluentCRM dashboard -> Settings -> SMTP/Email Service Settings section.
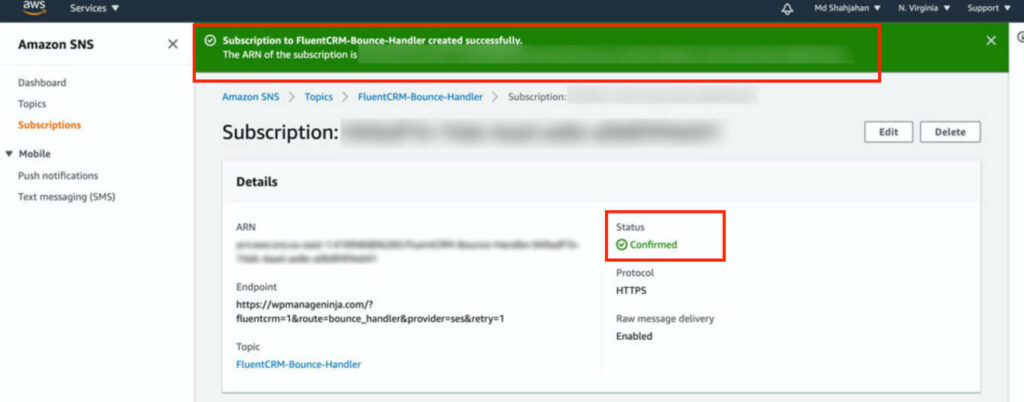
After putting the URL in the Endpoint field, check Enable raw message delivery and click on Create subscription button. You should see a success screen like below:
Configure Amazon SES to send bounce information to FluentCRM
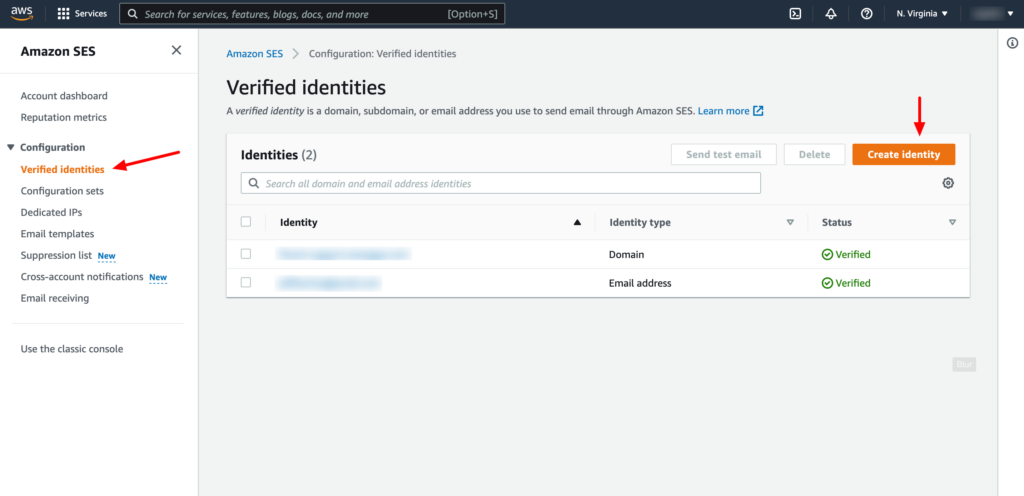
1. Go to Amazon SES console home, In the navigation pane, choose Verified Identities, and click on Create Identity.
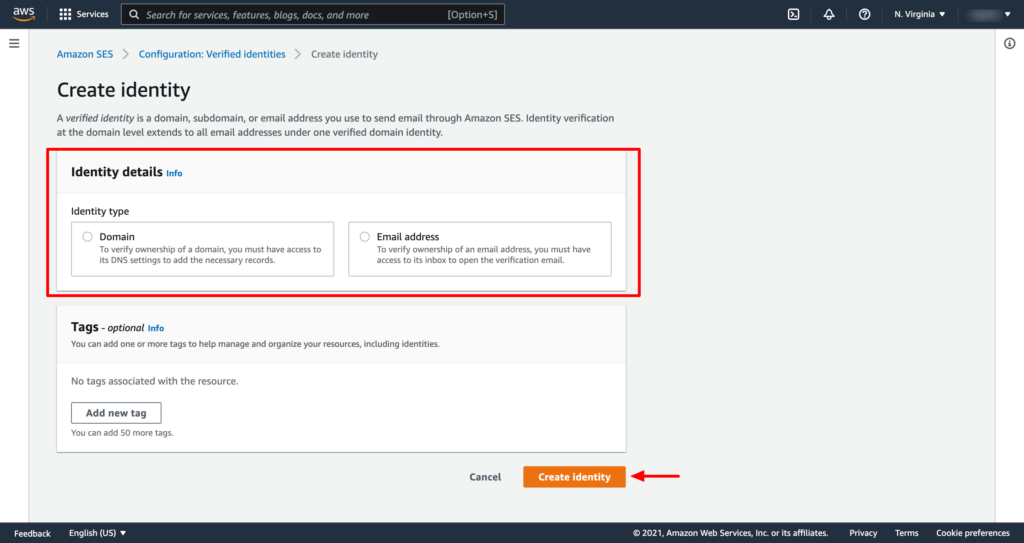
2. Create two identities, one for Domain and another for Email Address. You have to verify the domain and email address in order to set up the notification.
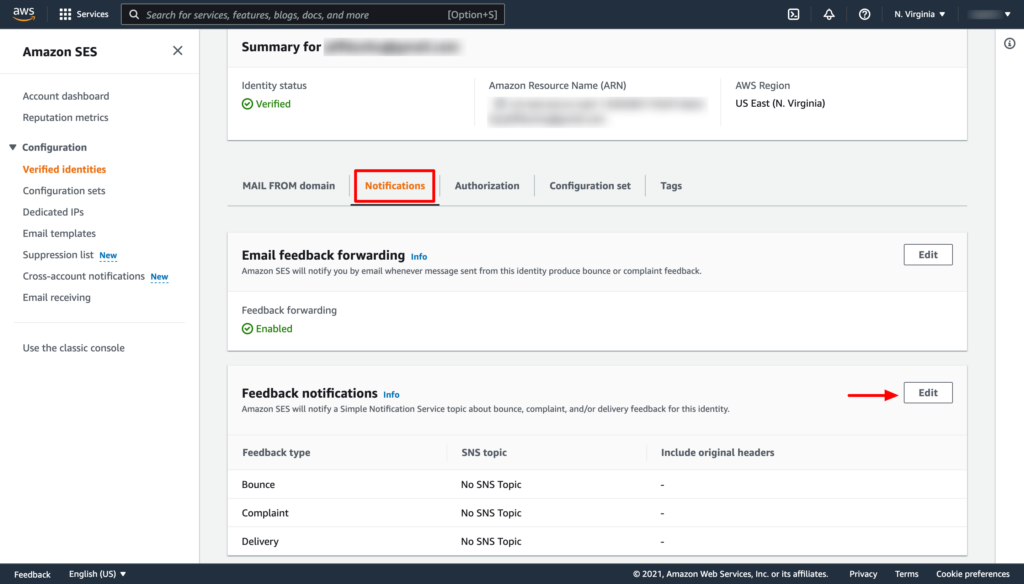
3. From the verified Identities list select the domain or email that you have just verified, In the navigation pane, choose Notifications, and click on the Edit button from the Feedback notifications section.
4. Under SNS Topic Configuration, for Bounces, select the SNS topic that you created. Do the same for Complaints.
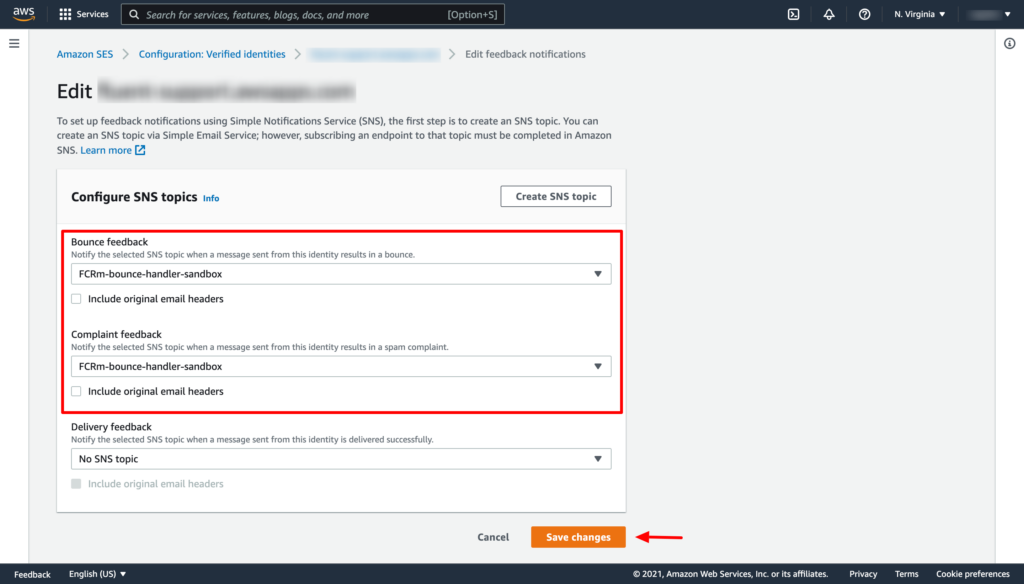
Now click on the Save changes button. Thats it!
You have to repeat the above two steps of adding the SNS topic for both the verified domain and email address separately.
Viewing Bounced Contacts #
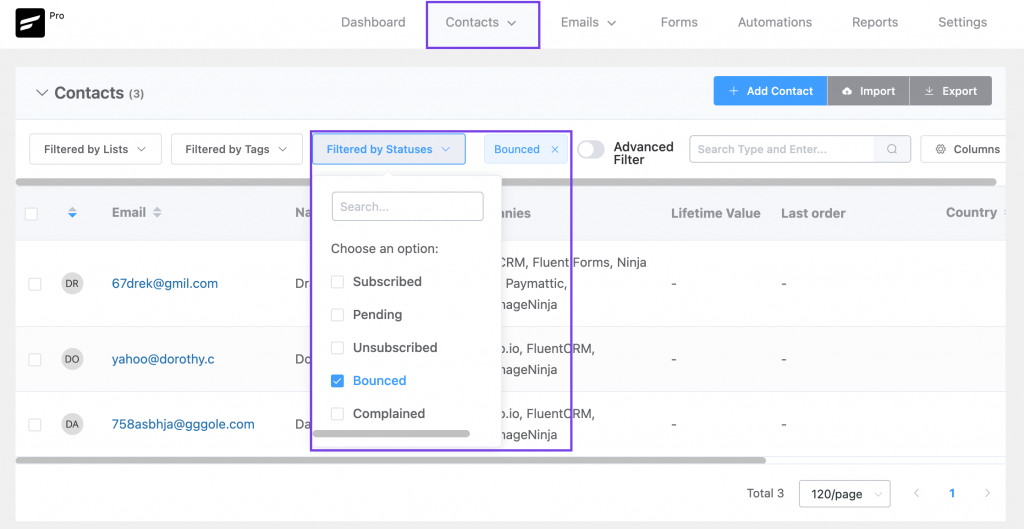
If you want to view bounced contacts, go to FluentCRM Contacts. Then click Filter By Statuses and enable the Bounced checkbox.