
In FluentCommunity, you can create, share, and even monetize courses for both private and public audiences. This guide will walk you through the process of monetizing your courses within FluentCommunity.
Set Up Your Course in FluentCommunity
Create or Edit a Course
Start by creating a new course in Fluent Community or using an existing one. For a detailed guide on course creation, check out this documentation here.
Set Course Privacy to Private
Navigate to the course you wish to monetize, go to the Edit option, and set the course’s privacy to Private. This change is essential for restricting access and introducing monetization. After setting the course to private, click on the Lock Screen option at the top menu.
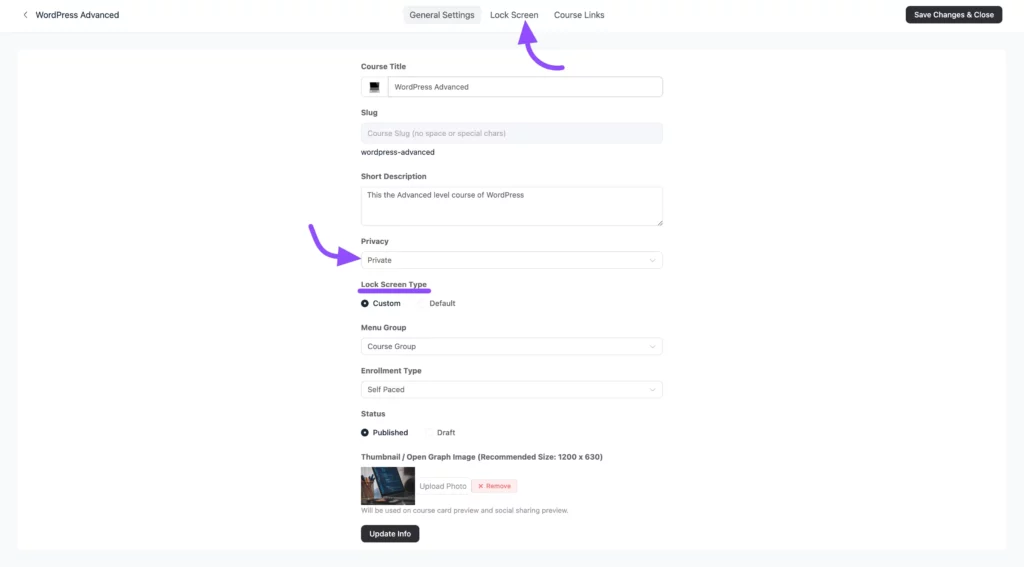
Enable Lock Screen
Here, you can customize a Lock Screen with a Call to Action (CTA) button. Refer to this documentation for design tips.
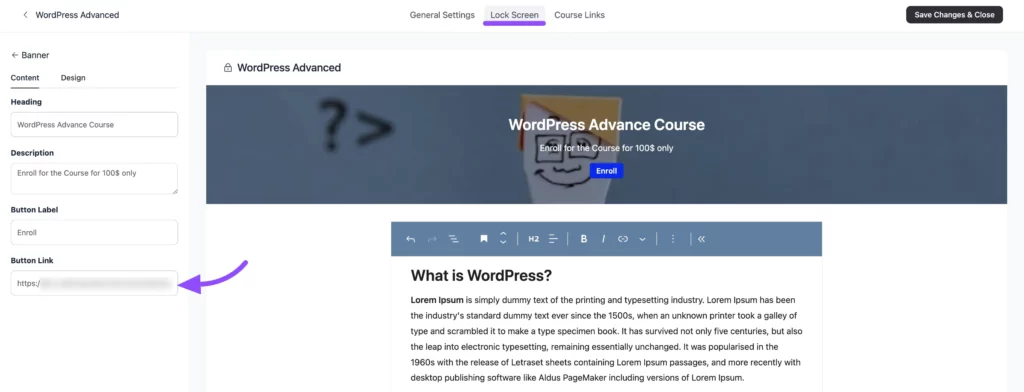
Add a Payment Option Using Fluent Forms
To create a payment form, you’ll need Fluent Forms Pro.
Create a Payment Form
In Fluent Forms, create a new payment form by adding essential fields and a Payment Field for the course price. Save the form once completed.
Link the Payment Form to the Lock Screen
Publish your form, and copy its URL. Then, go back to your Lock Screen’s CTA button and paste the form URL into the Button URL field.
Start Selling Your Course
With these settings, your course is ready to be sold. When users visit the course, they’ll see the Lock Screen with the CTA button directing them to the payment form. Upon completion, you can grant them access to the course.
This setup enables course monetization within your FluentCommunity platform.
If you have any further questions about this guide, please don’t hesitate to contact us.


